Azure DevOps
- Generate your API documentation & changelog
- Azure DevOps YAML Pipelines vs. Classic Pipelines
- Setting up Bump.sh with an Azure DevOps YAML Pipeline
- Troubleshooting
Generate your API documentation & changelog #
Azure DevOps has a feature called “Pipelines”, which allow you to chain together various actions for Continuous Integration & Continuous Delivery. In this tutorial we’ll show you how to create a pipeline, and use it to deploy your Bump.sh API documentation when new commits are pushed to your main Git branch, and show how to check for breaking changes on pull requests.
Azure DevOps YAML Pipelines vs. Classic Pipelines #
Azure DevOps supports two distinct pipeline formats, the old “Classic Pipelines” built and managed via a drag-and-drop interface, and “YAML Pipelines” which are configured entirely via a YAML file in the repo.
Seeing as YAML Pipelines are the newer approach, and many people may have never worked with Classic Pipelines, we’ll stick with YAML Pipelines for this tutorial. This also has the benefit of being entirely Git controlled, so you can change your pipelines along with your OpenAPI and all the API source-code all at once.
Setting up Bump.sh with an Azure DevOps YAML Pipeline #
Step 1: Setup Azure Organization & Project #
Sign in to your Azure organization if you have one, or sign up.
Then navigate to an existing project, or create a new one if you need to.
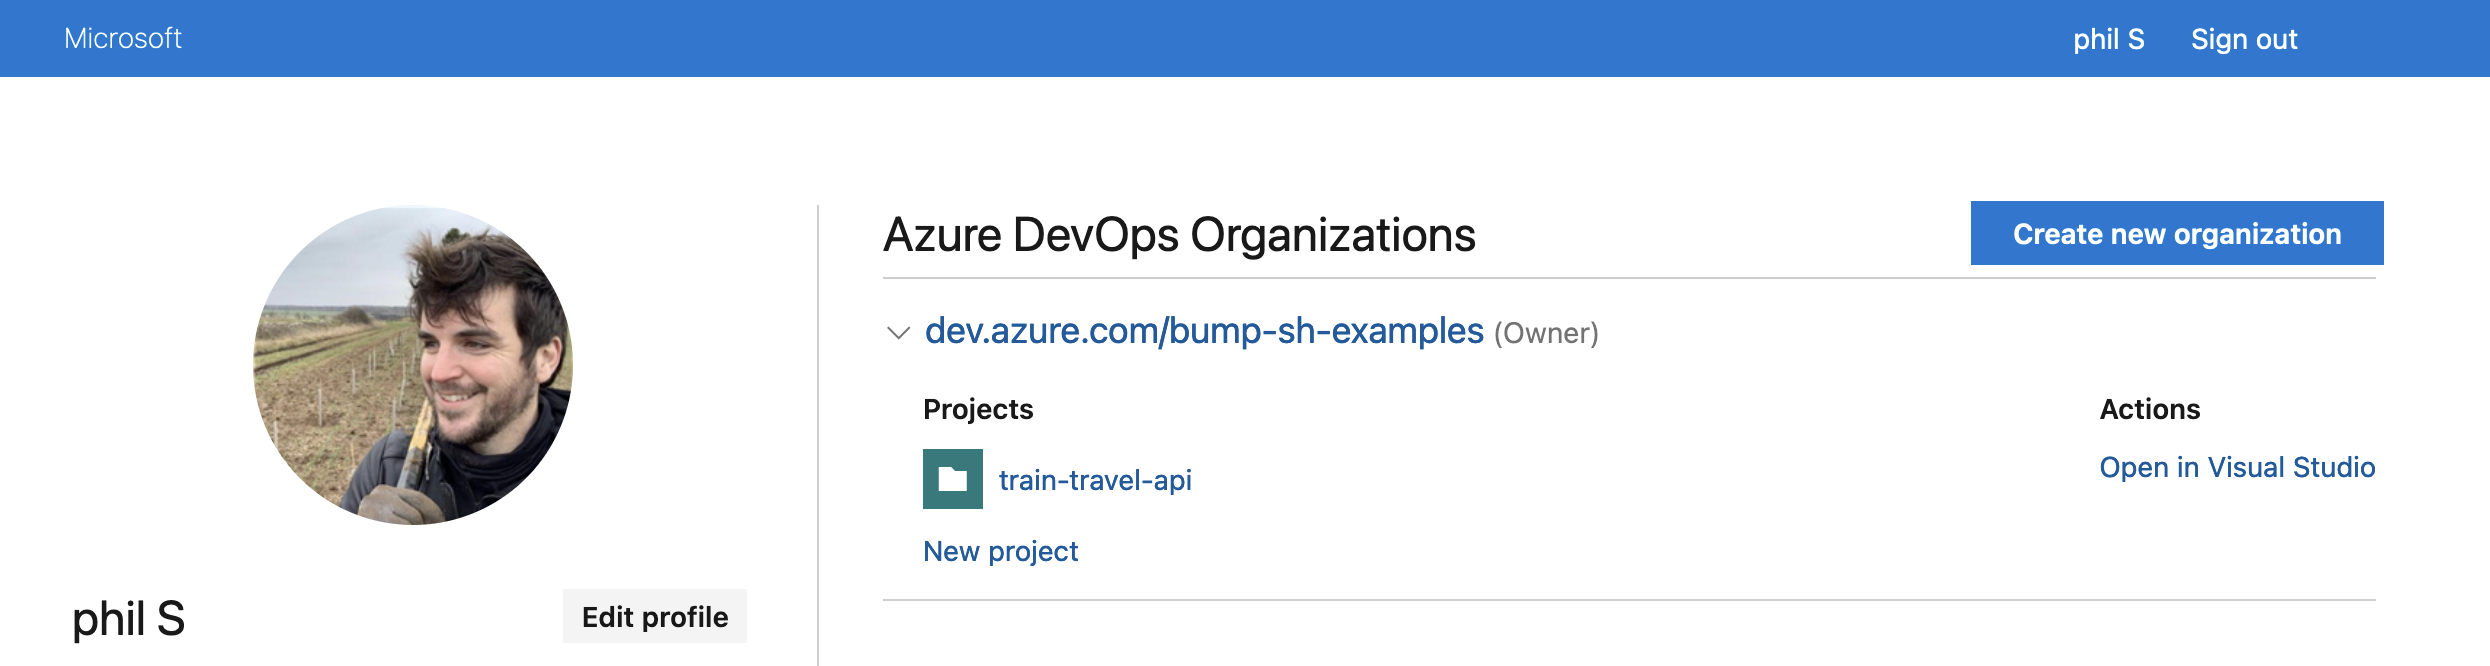
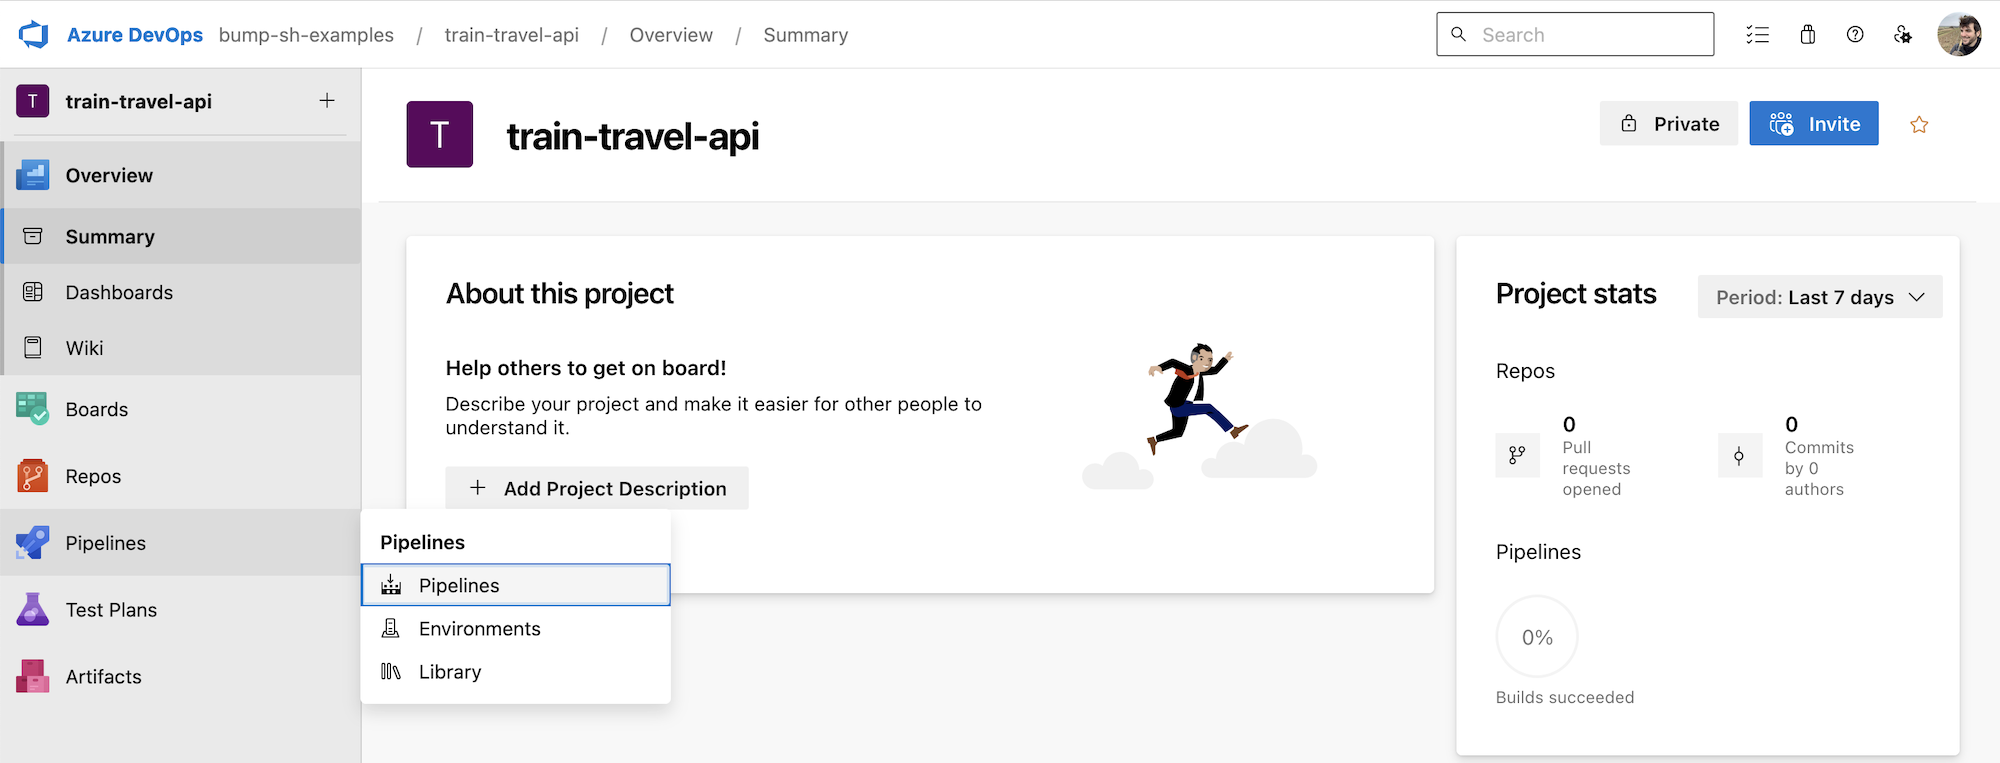
Click on the project, then click Pipelines, and New Pipeline to get the whole thing going.
Select where your code is hosted. You can choose from Azure Repos Git, GitHub, Bitbucket, or other repositories. For this example, we’ll assume you are using Azure Repos Git.
Step 2: Configure Your YAML Pipeline #
Choose YAML when prompted to configure the pipeline, and select the repository branch you want the pipeline to monitor (e.g., main).
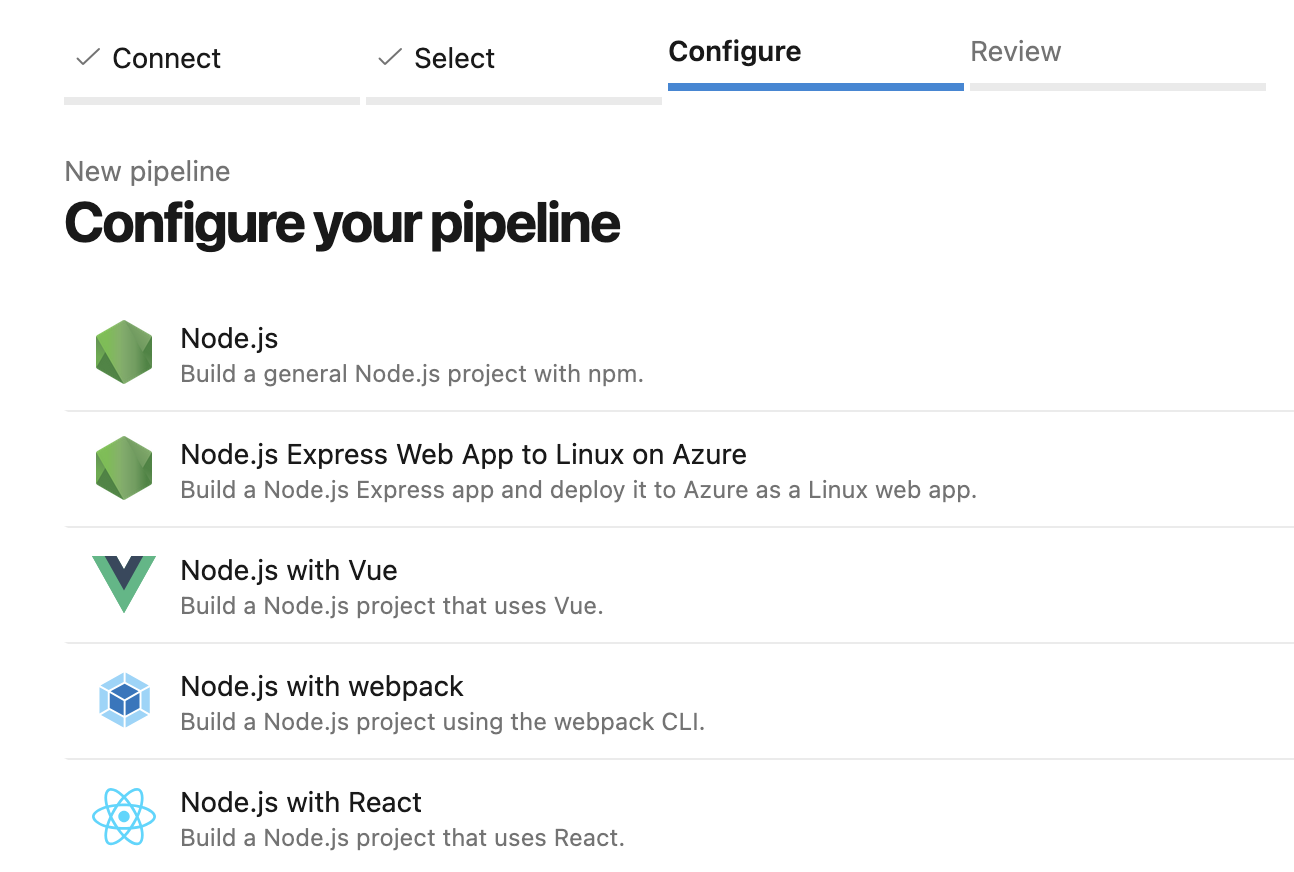
Then you’ll be presented with lots of options for start templates. Click “Node.js” because Bump.sh CLI is built with Node.
Now we can override the YAML Pipeline they’ve popped in the repo with our own. You can do this by cloning the new repository, or by pulling the commits on an exist repository.
Either way, let’s update azure-pipelines.yml with the following:
# azure-pipelines.yml
trigger:
  branches:
    include:
      - '*'

variables:
- group: bumpsh

  # Set to the location of the main OpenAPI document relative to repo root
- name: openApiDoc
  value: openapi.yaml

  # The Documentation ID or Slug found in Bump.sh API Settings
- name: bumpDoc
  value: azure-demo

pool:
  vmImage: ubuntu-latest
  demands:
    - npm

jobs:
  - job: openapi_diff
    # Only run this task if build was triggered by a commit to a branch other than main
    condition: and(succeeded(), ne(variables['build.sourceBranch'], 'refs/heads/main'))
    steps:
      - script: npx bump-cli deploy --dry-run $(openApiDoc) --doc $(bumpDoc) --token="$BUMP_TOKEN"
        displayName: Validate OpenAPI

      - script: npx bump-cli diff --format markdown $(openApiDoc) --doc $(bumpDoc) --token="$BUMP_TOKEN" > bump-diff.md
        displayName: Diff OpenAPI

      - task: PullRequestComment@1
        inputs:
          markdownFile: $(Build.SourcesDirectory)/bump-diff.md
        displayName: PR Comment

  - job: openapi_deploy
    # Only run this task if build was triggered by a commit to the main branch
    condition: and(succeeded(), eq(variables['build.sourceBranch'], 'refs/heads/main'))
    steps:
      - script: |
          npx bump-cli deploy  $(openApiDoc) --doc $(bumpDoc) --token="$BUMP_TOKEN"
        displayName: Deploy API Documentation
Let’s walk through a few key bits here.
- Trigger: This pipeline triggers automatically whenever changes are made to any branch. Later conditions will decide which jobs to do.
- Pool: Specifies that the pipeline should use the latest available Ubuntu agent, and it’ll need to have npm installed.
- Jobs: Jobs have a condition, and if it passes it will run the steps. In this example we’re making the condition check the branch is main and running deployment, or checking the branch is something else, and doing a diff on the OpenAPI to check for breaking changes.
Deployment is handled by the command npx bump-cli deploy which uses NPM’s npx command to avoid needing to run npm install in each step, and will grab the bump-cli NPM package so you can use the CLI on the fly.
Step 3: Setup Variables #
Variables can be set several ways in Azure DevOps, and we’re using two different approaches for publicly knowable variables and secrets. Here we’re setting a variable called openApiDoc to point to the main OpenAPI document, and bumpDoc which contains the ID or slug of the API Documentation on Bump.sh to be deployed to or checked against.
variables:
- group: bumpsh

  # Set to the location of the main OpenAPI document relative to repo root
- name: openApiDoc
  value: openapi.yaml

  # The Documentation ID or Slug found in Bump.sh API Settings
- name: bumpDoc
  value: azure-demo
The variable group in there refers to a group of environment variables, and these are defined in the Azure DevOps interface: Pipelines > Library and click on + Variable Groups.
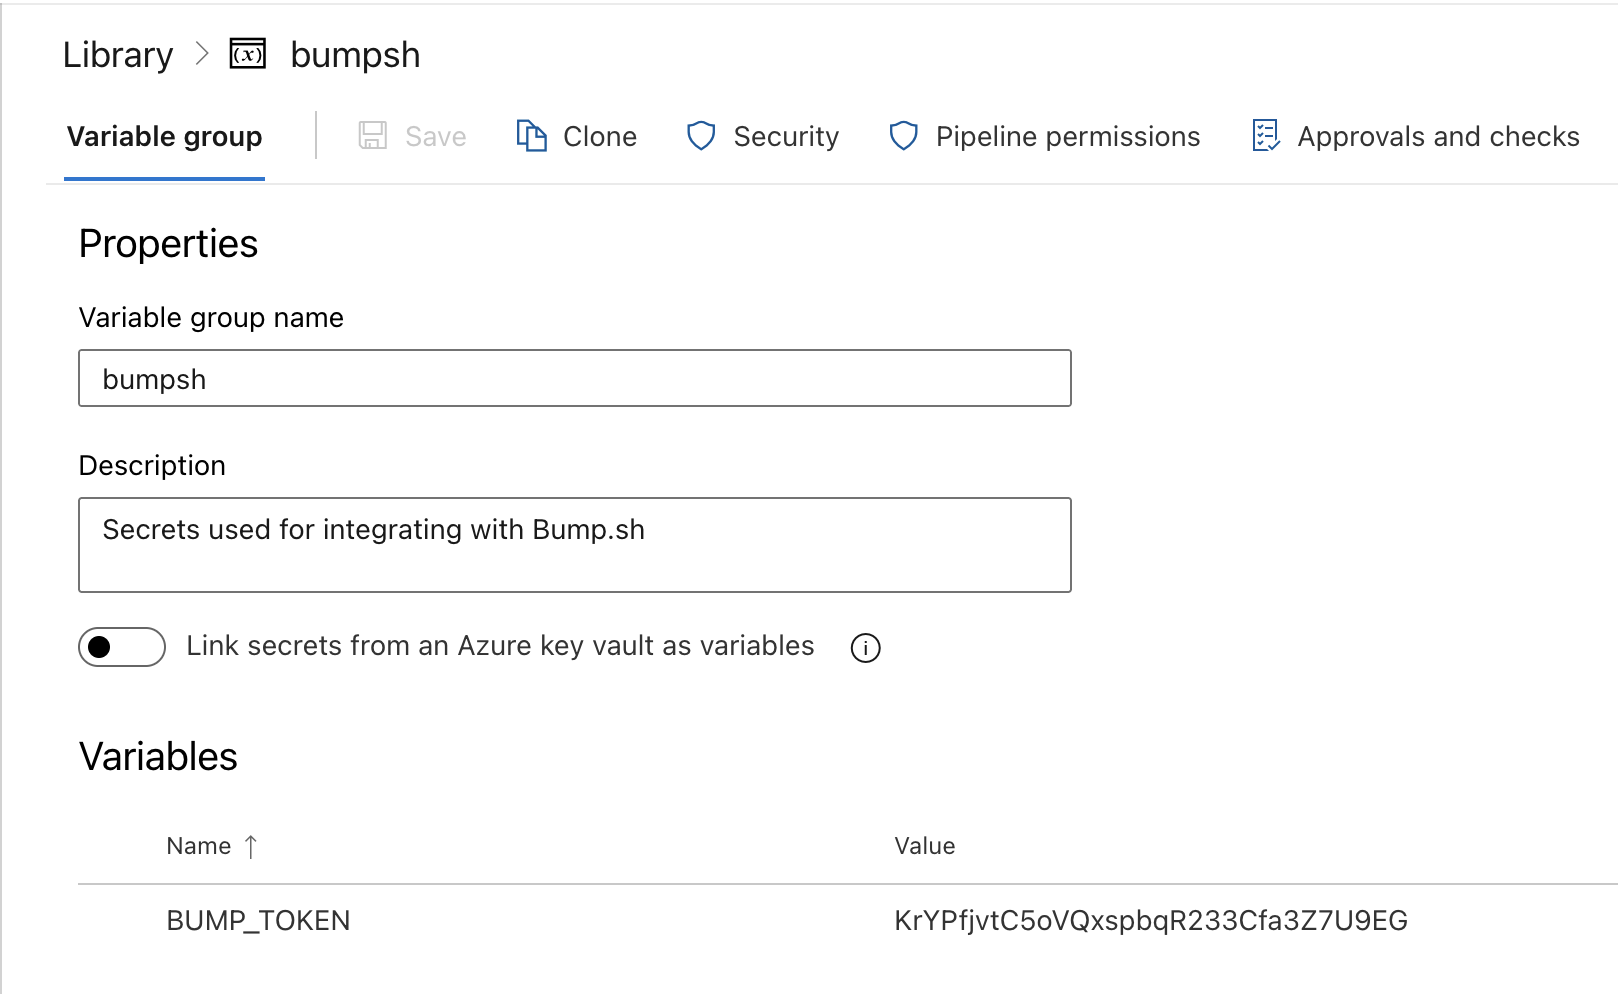
Create a new group with the name bumpsh, which matches the group: bumpsh we defined in the workflow.
In another browser tab, pop over to your Bump.sh API’s Documentation settings, go to the “CI deployment” section, and grab your API key.
Back in the Azure variable group page, create a new variable called BUMP_TOKEN, paste in the API key, and click the lock icon to make it secret.

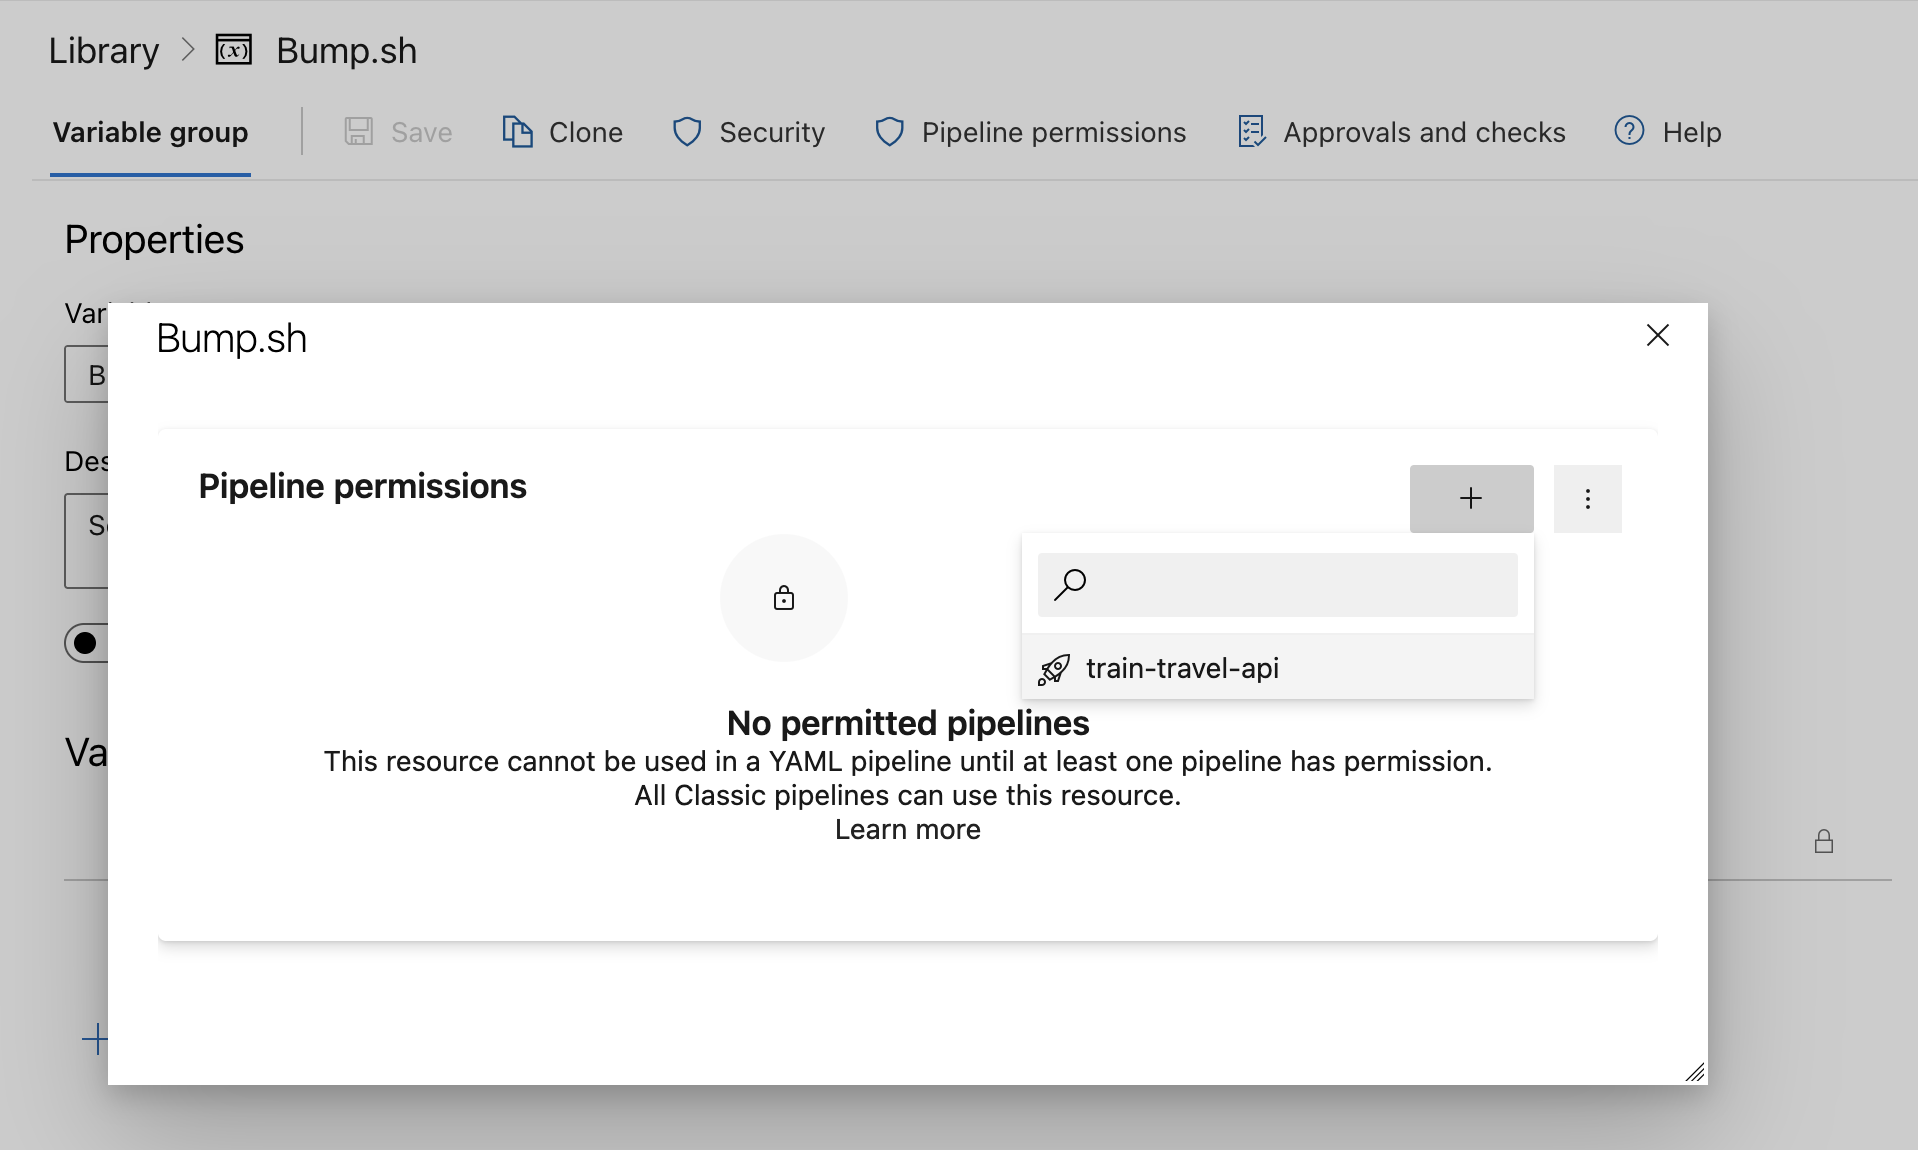
For security reasons, referencing the variable group in the YAML workflow is not enough to give the pipeline access to the variables. This requires one more step: click “Pipeline permissions” and select your pipeline.
Now we should be good to go!
Step 4: Save and Commit the YAML File #
Make sure the pipeline file is saved as azure-pipelines.yml in the root of your repository, commit, and push.
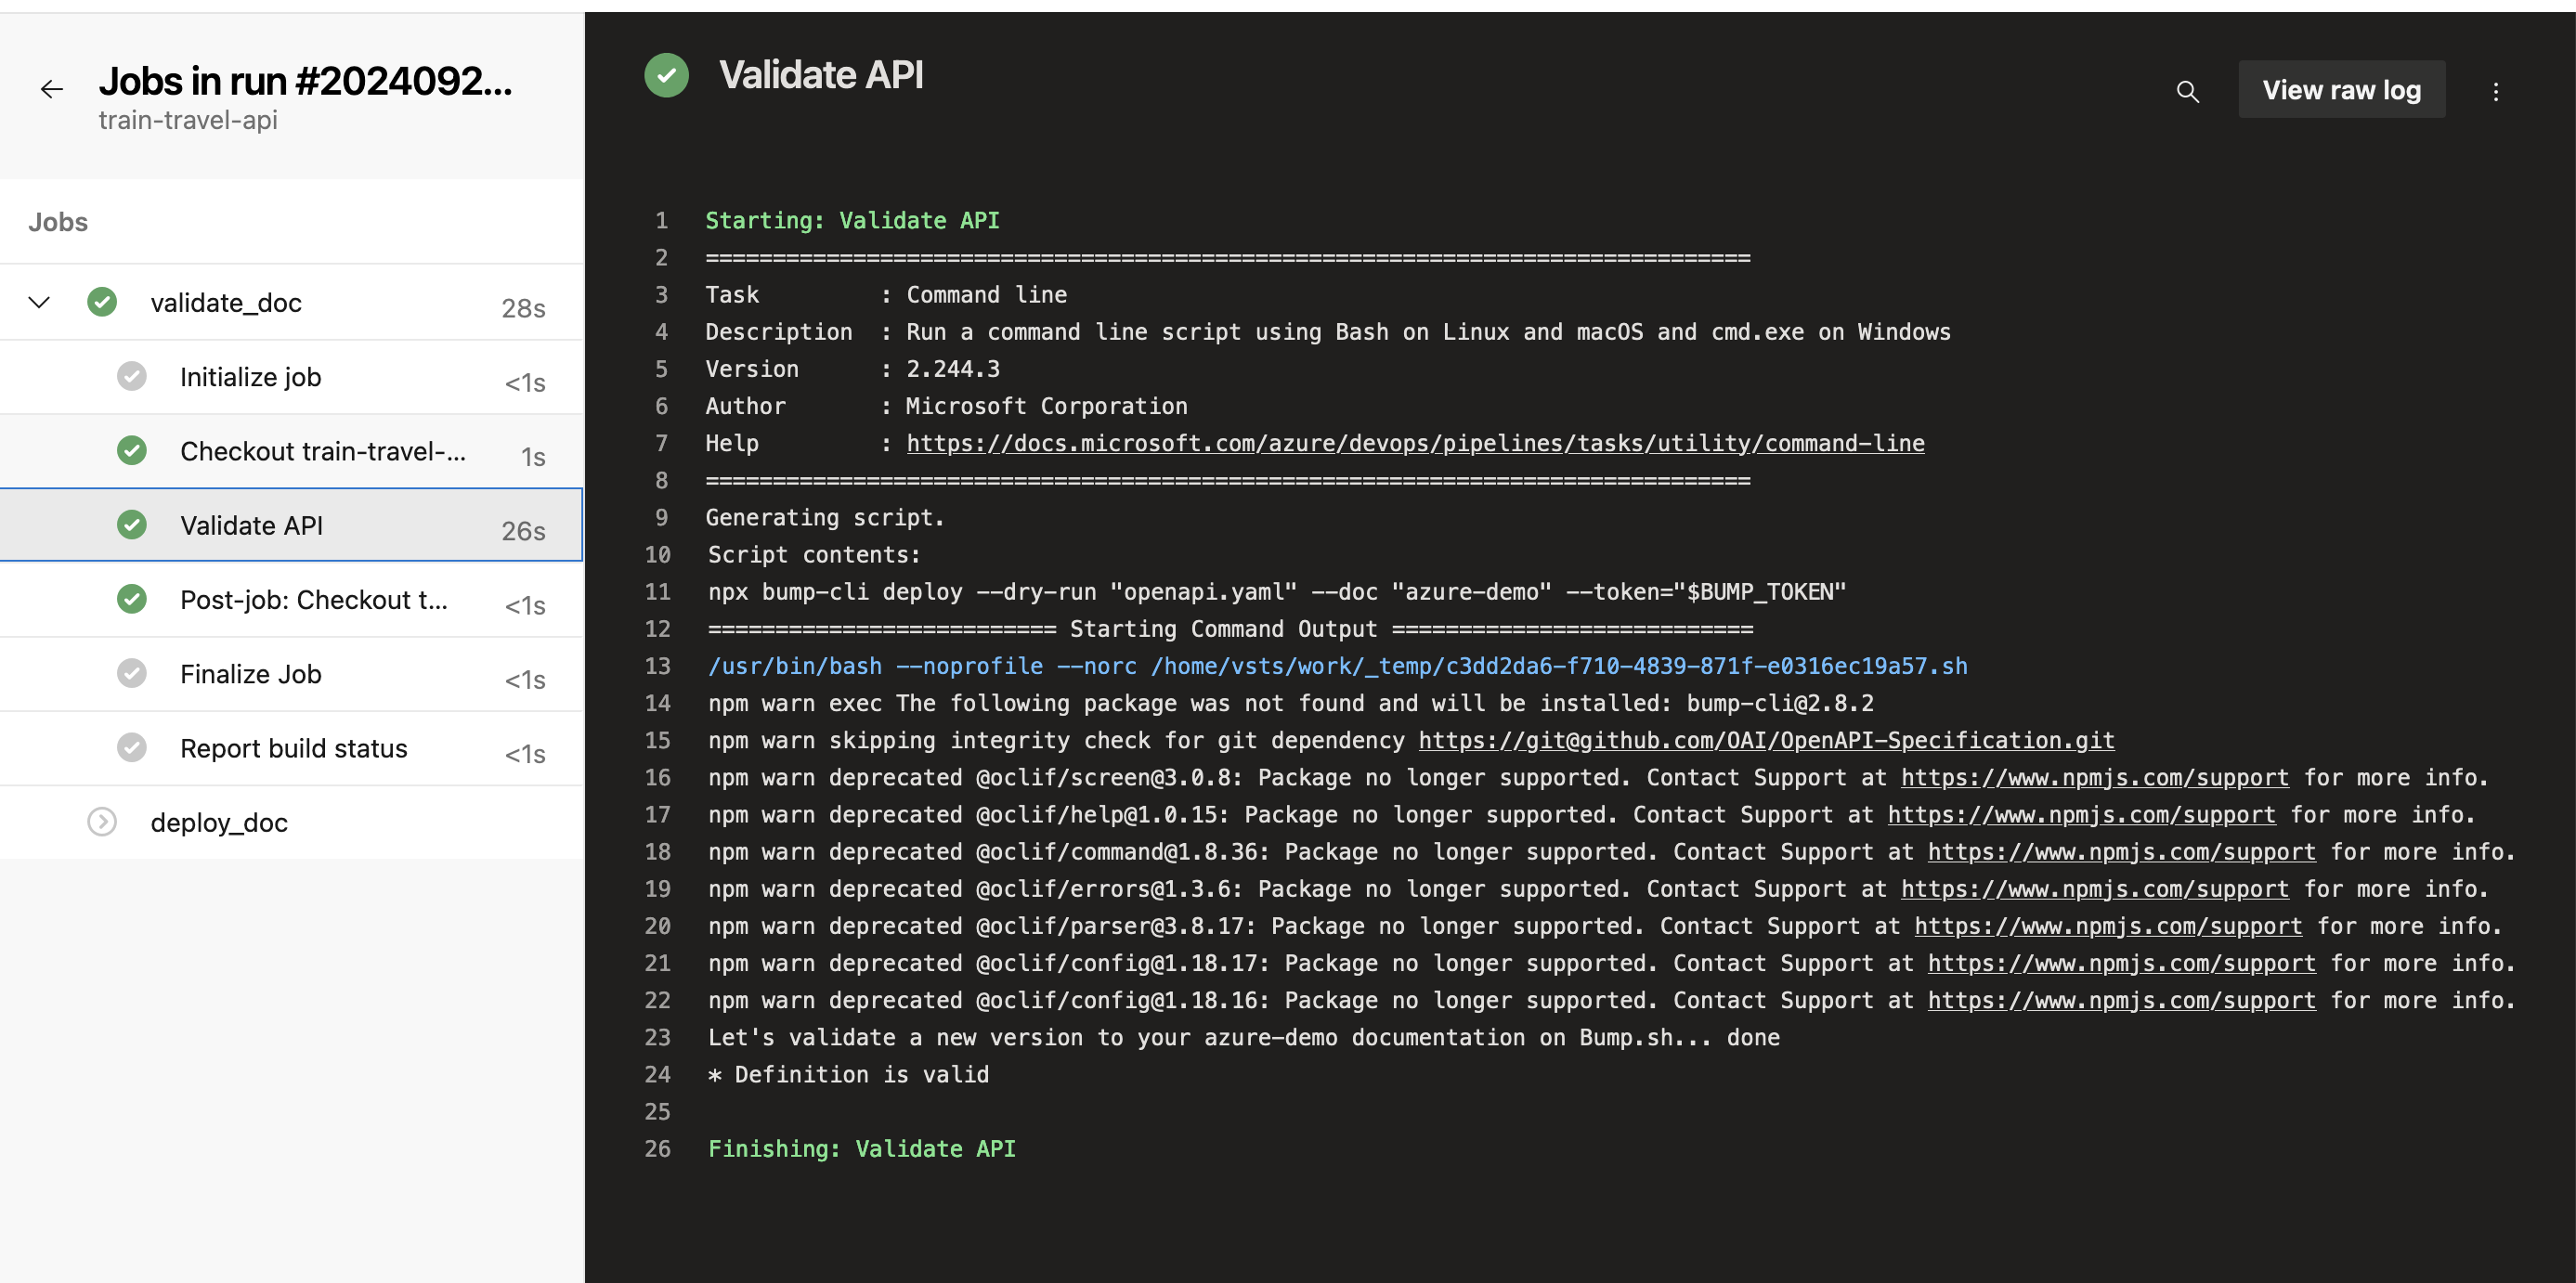
When pushing to a branch other than main, you should see output like this in the Pipelines section of the Azure Devops interface, letting you know if the OpenAPI was valid or not.
When pushing to the main you will trigger the deploy job, which will update your hosted Bump.sh documentation if any changes are detected, which will look like this:
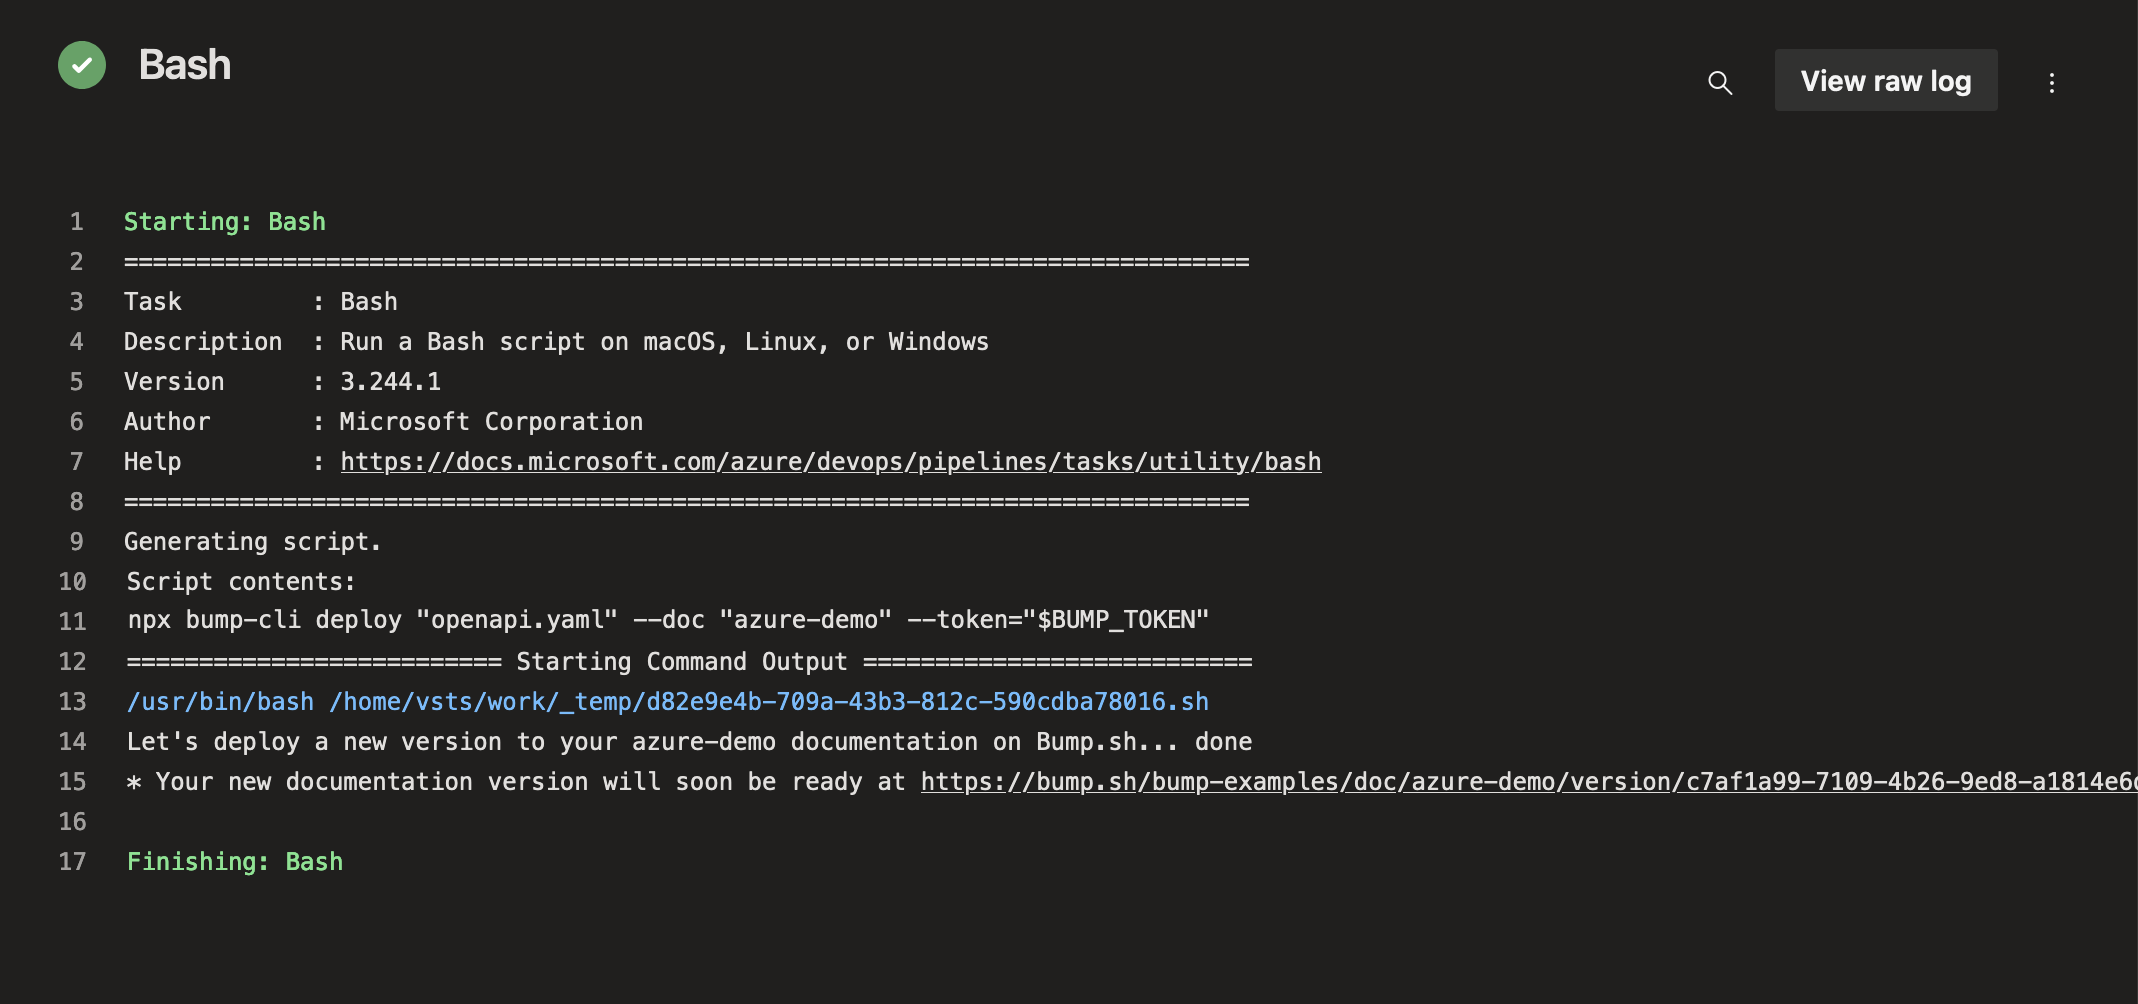
Here we can see the documentation has been created, and there’s even a link to go and see it.
Step 5: Diff Detection Comments #
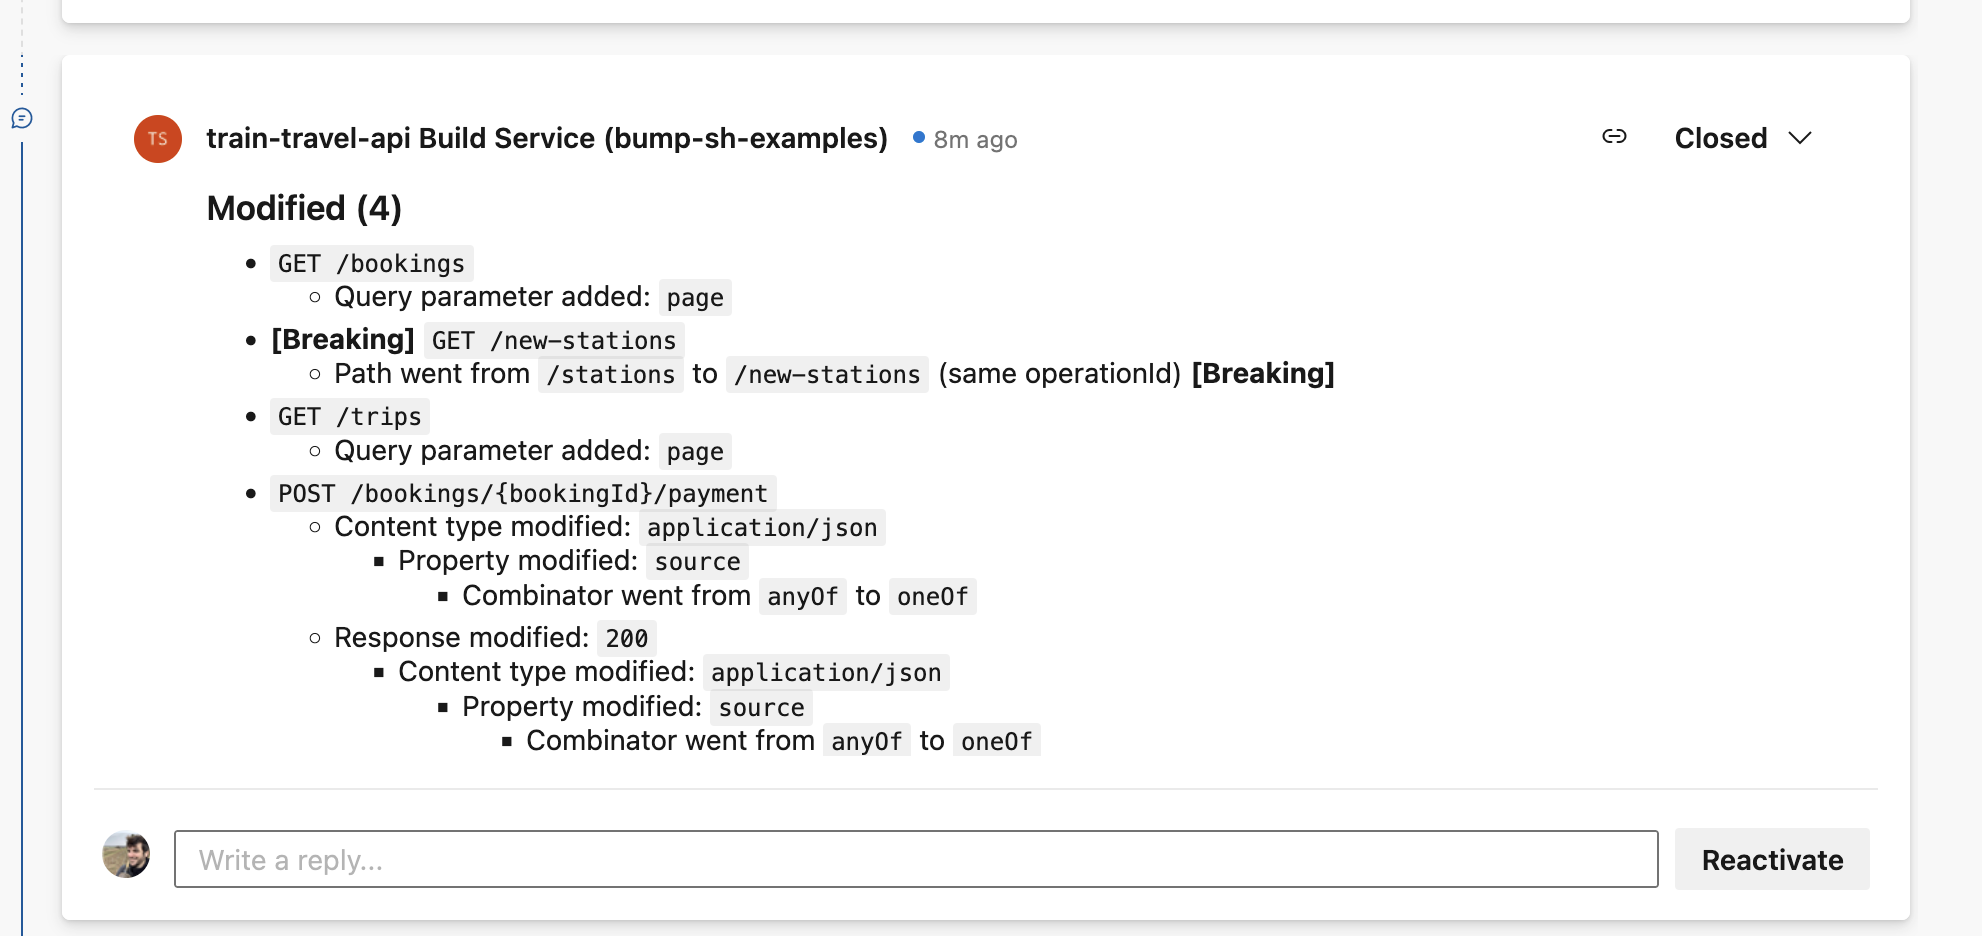
One of the most powerful features in Bump.sh is the automated changelog, and this logic can be used to speed up API Design Reviews by showing people clearly in a single comment what has changed in a pull request. Instead of having to look at lots of YAML, you can see a summary of all meaningful changes added as a comment.
This is powered by the wonderful PR Comment Task which you will need to install for your Azure DevOps Organization.
You may need to add Contribute to pull requests permission to your Project Collection Build Service Accounts from Project Settings > Repositories > Security, then you should be good to go.
If you don’t want to have the change detection comments, just delete the following section from azure-pipeline.yaml.
  - script: npx bump-cli diff --format markdown $(openApiDoc) --doc $(bumpDoc) --token="$BUMP_TOKEN" > bump-diff.md
    displayName: Diff OpenAPI

  - task: PullRequestComment@1
    inputs:
      markdownFile: $(Build.SourcesDirectory)/bump-diff.md
    displayName: PR Comment
Troubleshooting #
If this is a new Azure DevOps account you might have problems with:
“No hosted parallelism has been purchased or granted.”
You can request free pipeline runs by entering a name and address in this web form. It says it might take 2-3 days but it’s usually closer to 1.