Branching
What are branches #
What we refer to as “Branching” is a solution that allows you to have multiple different definitions of the same API documentation on parallel branches.
Branches can, for example, be used to distinguish between two environments of your API documentation, such as production or development environments. Another example is keeping track of previous versions of an API (e.g., 1.0, 1.1, 2.0, etc.).
You can create as many branches as necessary, and each of these branches can receive its own deploys and has a distinct changelog from others. You can choose which branch will be displayed and used by default for deployments (when no target branch is designated).
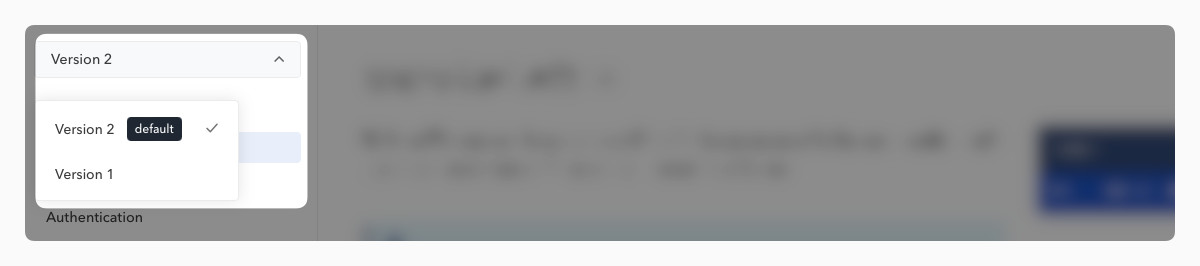
Switching from one API definition to another in the documentation can be done in an instant via a dropdown menu.
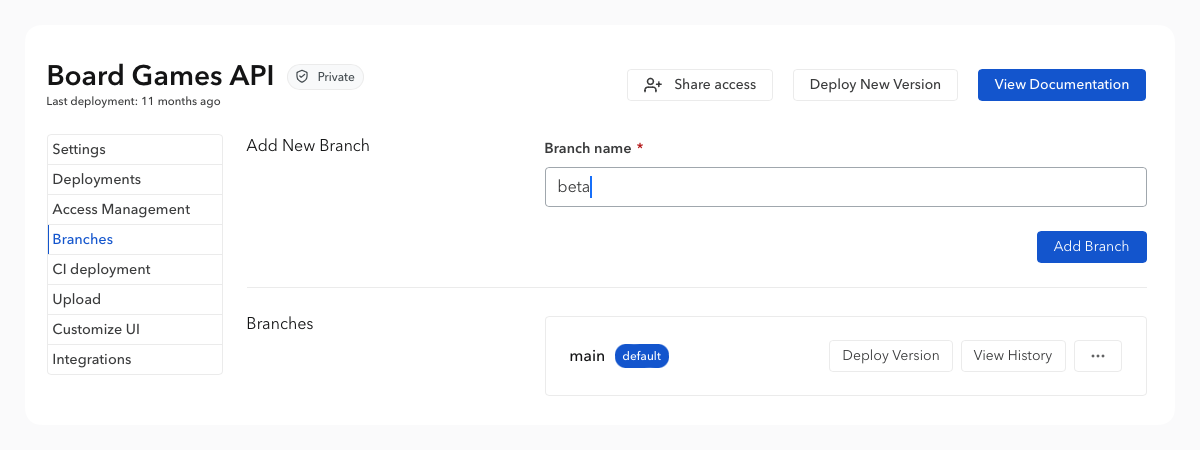
Create a branch #
From the documentation settings, the Branches section allows you to create branches. Enter the name of the new branch and confirm. You can also create branches directly with our CLI or our API.
Once you have created your branch, you can start uploading and deploying your first API definitions using your dashboard, the CLI, or your CI.
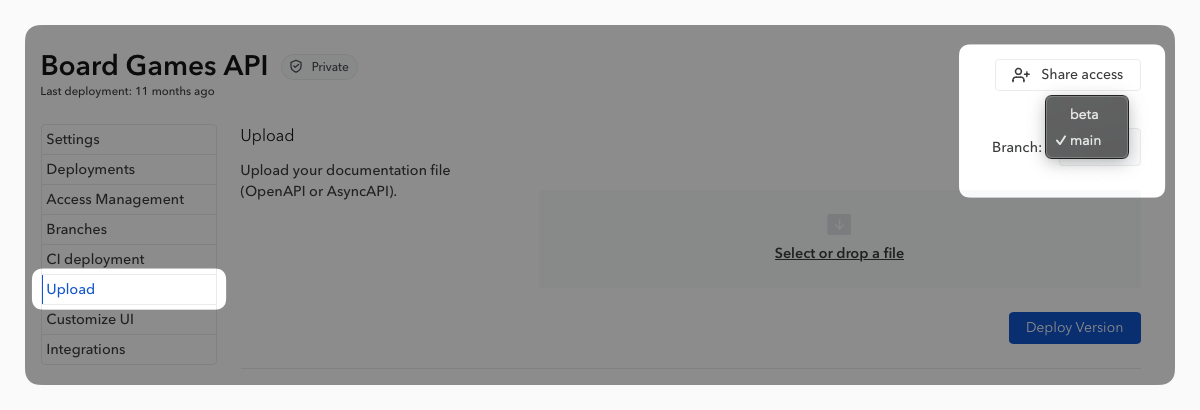
Deploy to a specific branch #
Deploying an API definition in a branch follows the usual procedure, with an additional step where you specify which branch to add this new definition to.
From the documentation settings, in the “Upload” section, select the branch in which to deploy the API definition before confirming the upload.
Using the Github-Action #
When deploying via the Github-Action, you can specify the target branch using the branch: input parameter. If the branch does not exist, it will be created at this stage. Your Bump.sh deployment step will thus need to be changed to:
      - name: Deploy API documentation
        uses: bump-sh/github-action@v1
        with:
          doc: DOCUMENTATION_SLUG_OR_ID
          token: ${{secrets.BUMP_TOKEN}}
          branch: BRANCH_NAME # New input specifying the branch name
          file: doc/api-documentation.yml
You will need to set a secret variable on your Github repository settings named
BUMP_TOKENwith a valid Bump.sh token. This token value can be found in your documentation settings under the “CI deployment” section.
Using the CLI #
When deploying via the CLI, it is possible to specify the target branch using the --branch <branch-name> parameter. If the branch does not exist, it will be created at this stage.
bump deploy path/to/file.json --doc my-documentation --branch staging
You will need to pass your private documentation access token for this command to work. Either with the
--tokenflag or via theBUMP_TOKENenvironment variable. This token can be found in your documentation settings under the “CI deployment” page.
Using the API #
Our API lets you publish to a specific branch by providing the branch_name request body parameter. However, we recommend using either our CLI or our Github-Action to publish your API documents to Bump.sh.
Our dedicated Branch API endpoints, help to manage the branches of your documentation. You can create a new branch, delete one, list them all, or select one as the default branch.
Please note that, currently, the API does not support renaming a branch.
Rename or delete a branch #
The Branches section allows you to edit the name of a branch, set it as the default (the one that will be displayed when accessing the documentation), or delete it. After changing the branch name, don’t forget to update your CI or CLI deployment settings.
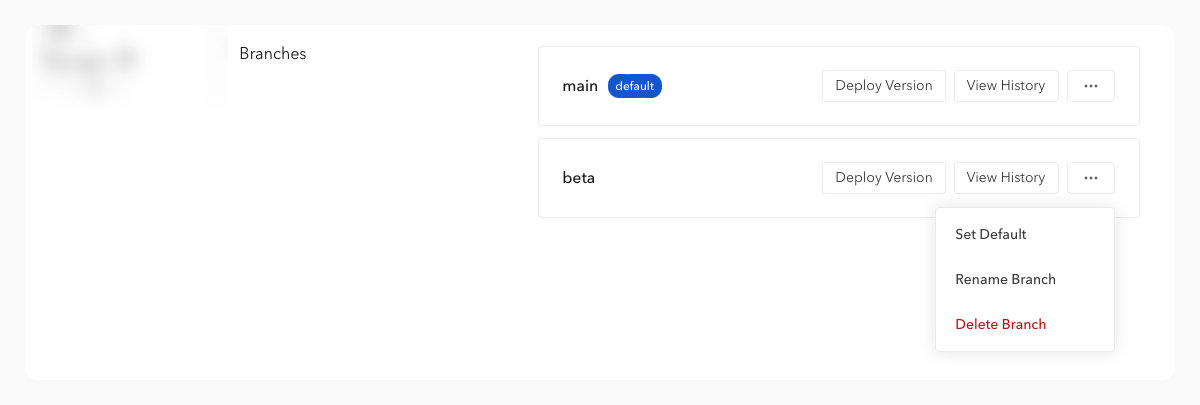
Deleting a branch is definitive: you will lose the branch, its content and deployment history.