OpenAPI Format: A GUI for Overlays
Overlays for OpenAPI and AsyncAPI are all the rage, helping all sorts of users improve API descriptions by “patching” in extra content. Tech writers improving bare bones OpenAPI with descriptions and tags to improve the resulting API documentation. Developers are popping code samples for generated SDKs in instead of relying on generic samples. The utility of this specification seems limitless, but overlays come with a steep learning curve.
The OpenAPI Format Playground aims to make things easier with a graphical interface on building and applying overlays, so let’s take a look at how it works.
What is OpenAPI Format #
OpenAPI Format started life as a NPM command-line tool, with the goal of helping to tidy up OpenAPI documents. It can remove unused components, sort various components and parameters alphabetically, upgrade documents from OpenAPI v3.0 to v3.1, and all kinds of other handy utilities to keep OpenAPI documents neat and tidy.
Recently OpenAPI Format got the ability to apply overlays to OpenAPI documents, but they didn’t stop with a command-line interface for this.
Introducing OpenAPI-Format Playground #
The maintainers of OpenAPI-Format built a Playground, a web interface to help folks work with overlays in a visual way.
Overlays are essentially a series of “actions” which can be applied to a document, in order to create a new document with the resulting changes. Actions need a target defined as a JSONPath to point to a particular part of an OpenAPI document, and an action type of of “update” or “remove”. These actions can be used in combination to add new content, replace content, or filter out bits that aren’t wanted.
Figuring out how to do all of this just from staring into an empty text editor can be a bit rough, so let’s try using the playground to guide us on our way.
Creating Overlays with OpenAPI-Format Playground #
Step 1 - Add an OpenAPI document #
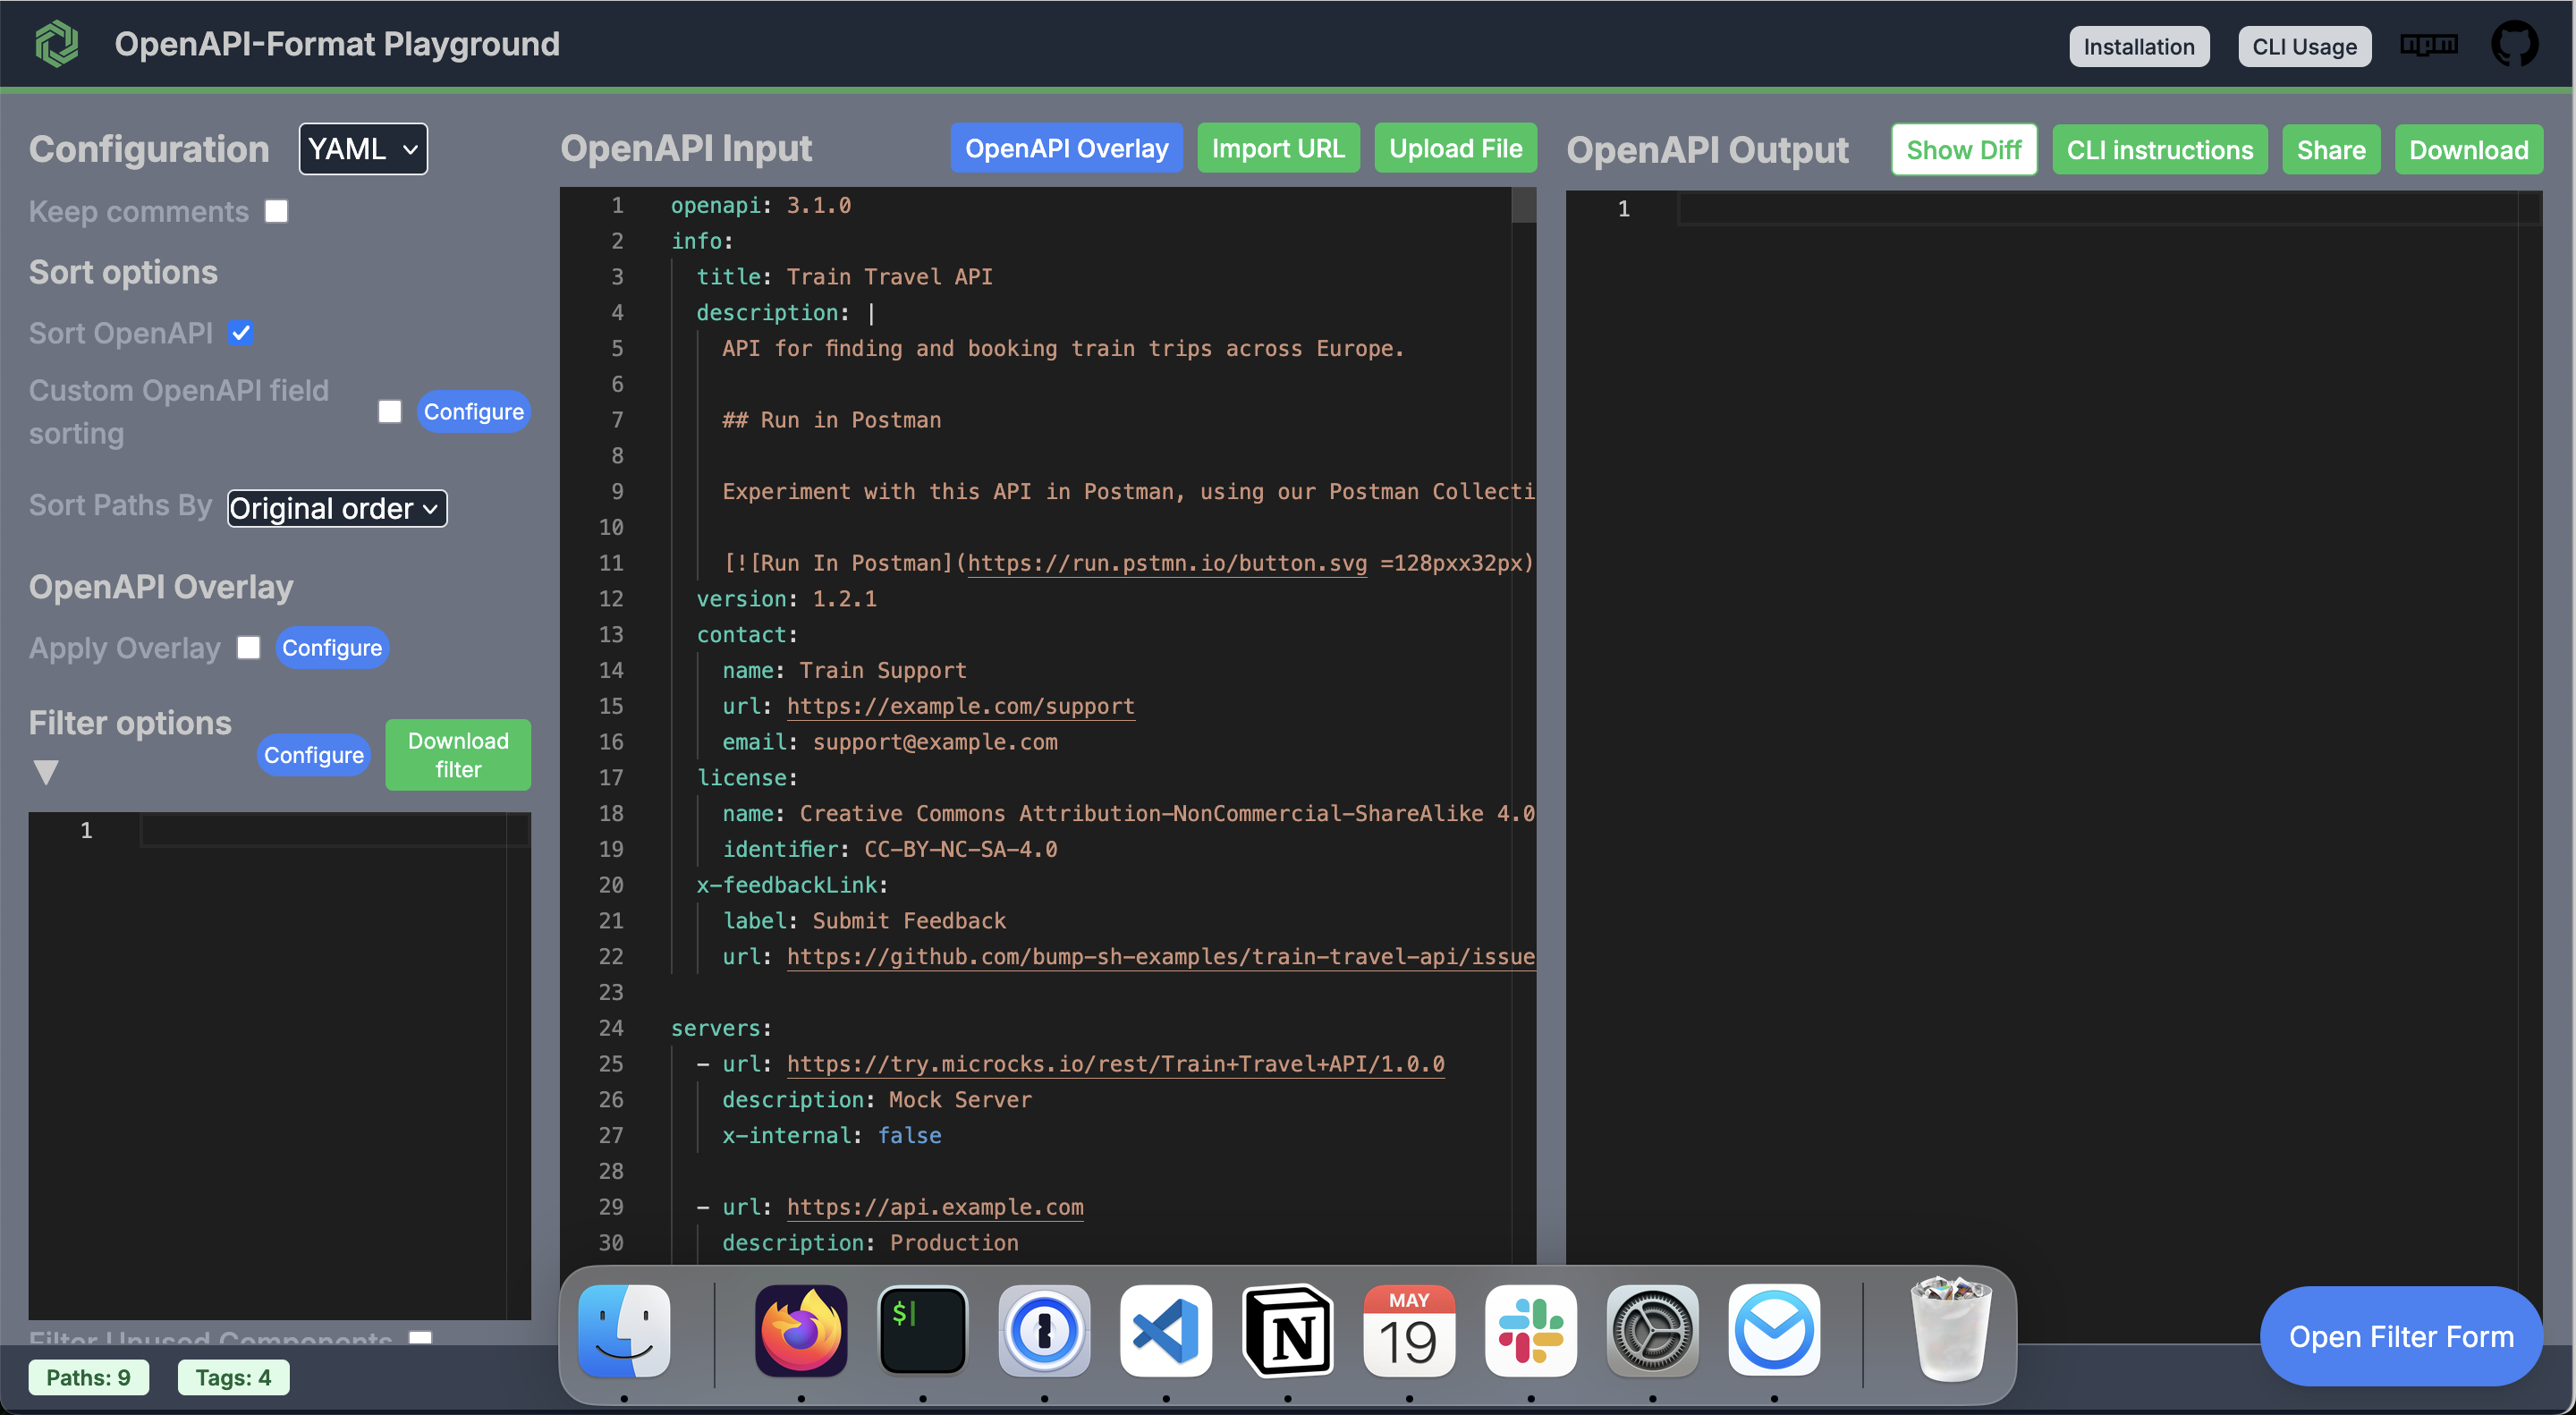
Copy in some OpenAPI into the box on the left. If you don’t have any handy why not use the Train Travel API by Bump.sh.
Step 2 - Open the Overlay section #
Click the “OpenAPI Overlay” button and it will go to a different section. In here you can give your Overlay a name, something that describes what we are trying to do.
For example: “Add descriptions to tags” is pretty clear about what is going to be achieved by the actions of this overlay. The version number can be whatever.

Step 3 - Play with JSONPath #
JSONPath is hard and scary at first, but much like RegEx it can be mastered, especially with the help of a handy tool like this.
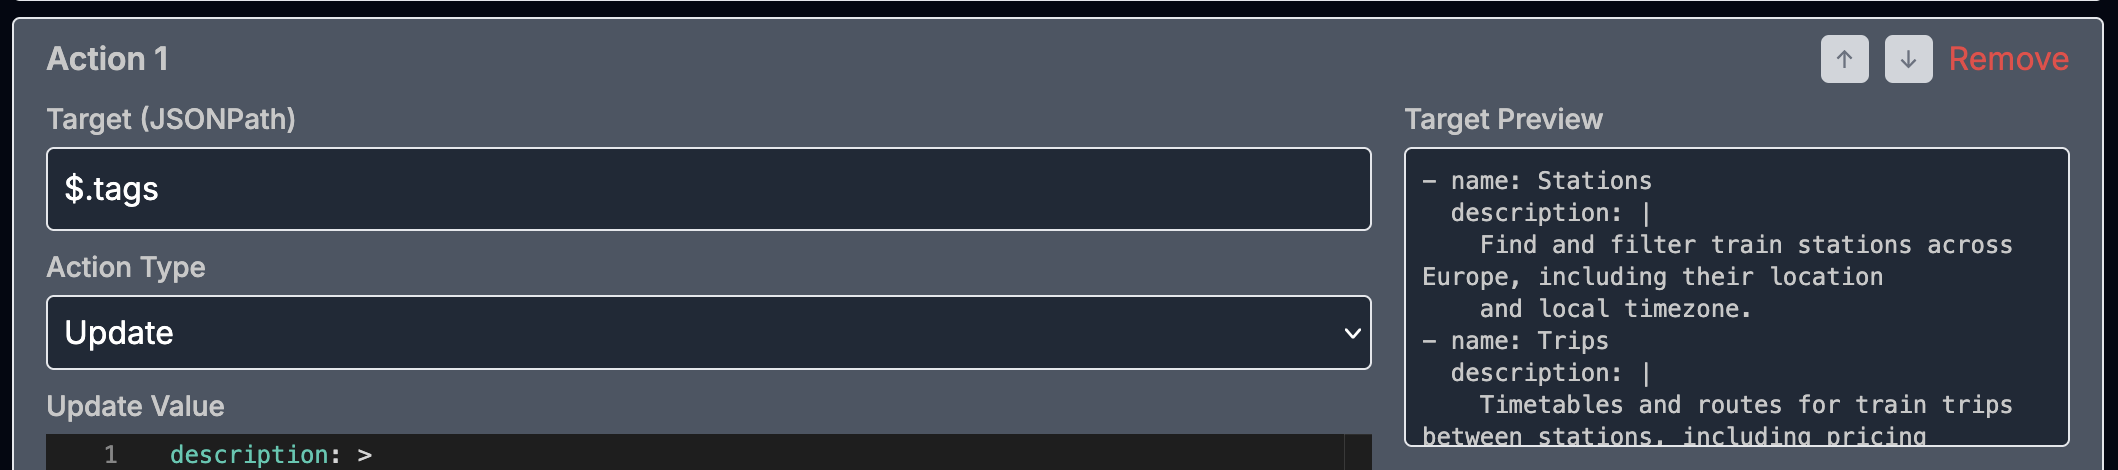
To start with JSONPath you use the $ as the root, then . to go to a property. The OpenAPI structure can be navigated like this, so something like $.info $.paths $.tags or $.components is a good start.
When you type in a JSONPath in the Target field, the Target Preview will update, so you can be certain you are working on the right bit of the OpenAPI document.
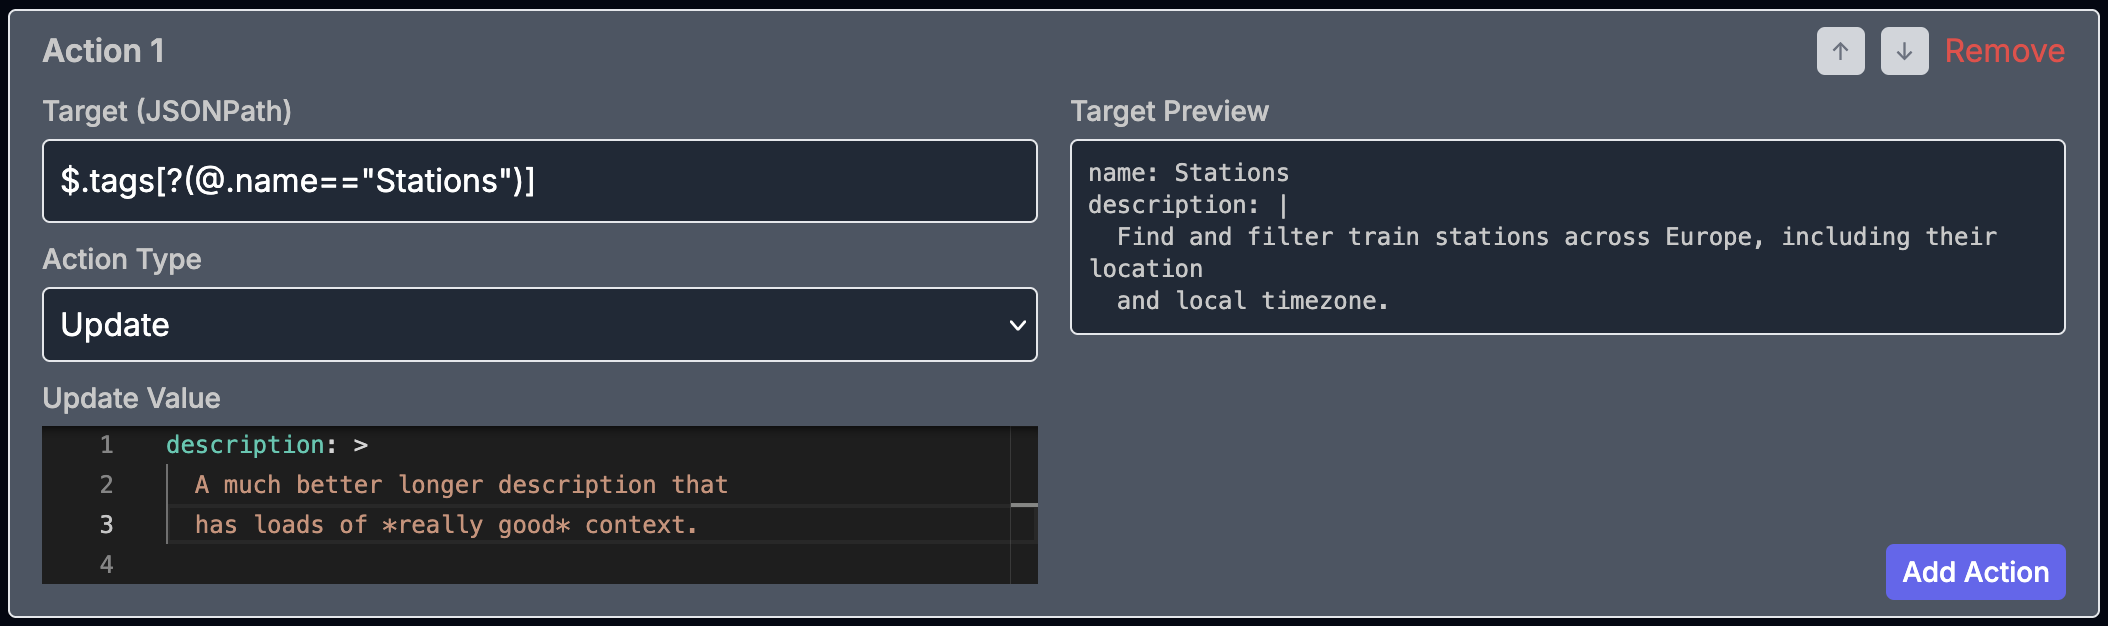
To update a specific tag, JSONPath supports filters, which use a ?(condition) syntax. Here I am looking through an array of objects for the one which has a name property equal to “Stations”: $.tags[?(@.name == "Stations")].

The JSONPath worked, I can see the tag object is there in the target preview. Now to work on the action.
Step 4 - Create the first Action #
Overlay actions come in two flavours: “update” or “remove”.
Update is basically a merge, taking the value provided and updating the target to include these values. If it’s an object it will add in the properties provided and override any that were there with the same name.
To add/override the description for a specific tag, we can pass a new description property, along with any other properties from the tags object.
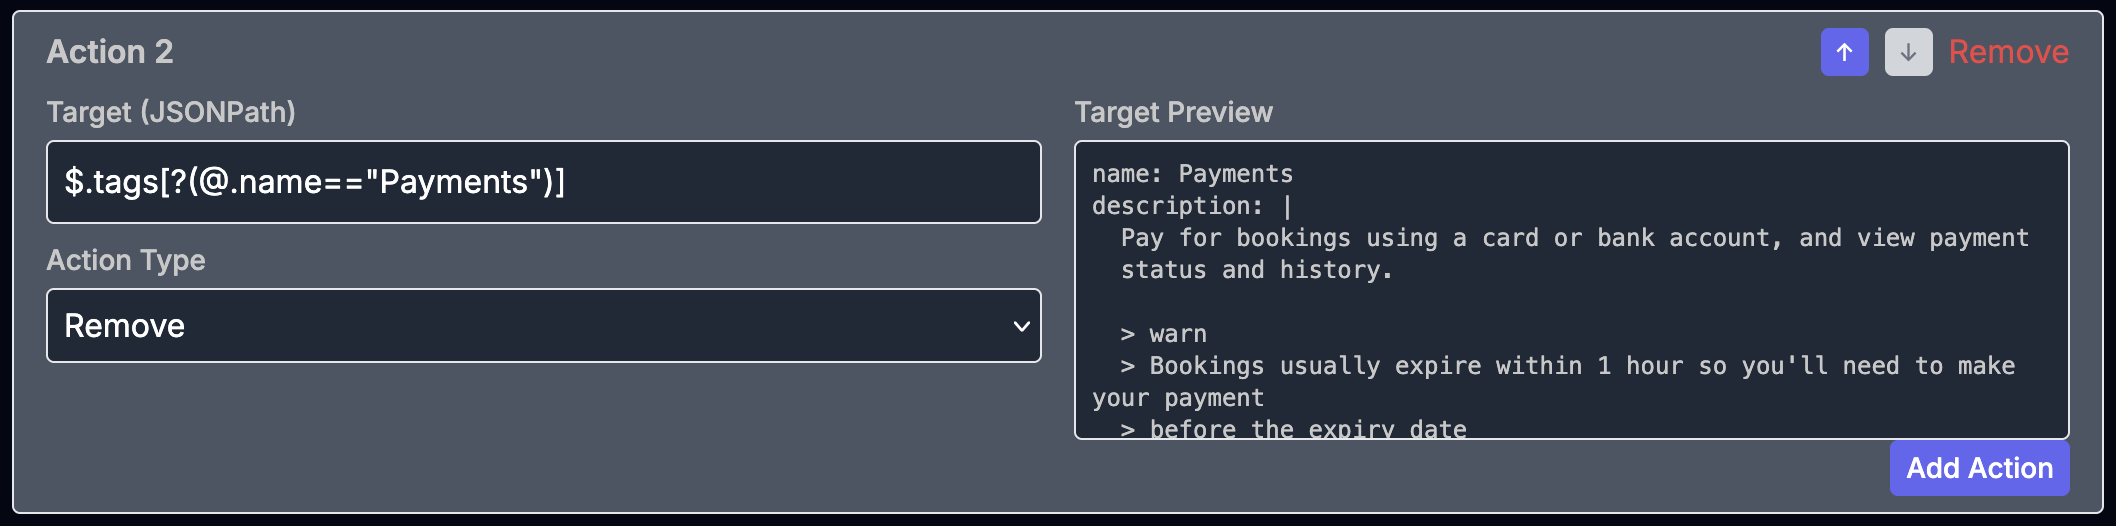
Remove will not need to take a value, it just removes the target object entirely. For example, removing the tag Payments.
There’s a whole lot more than can be done than just mess with tags, but instead of getting stuck into advanced overlaying, let’s see how these two actions run.
Step 5 - Compare the output #
Click the “Apply Overlay” button and it’s back to the main Playground screen.
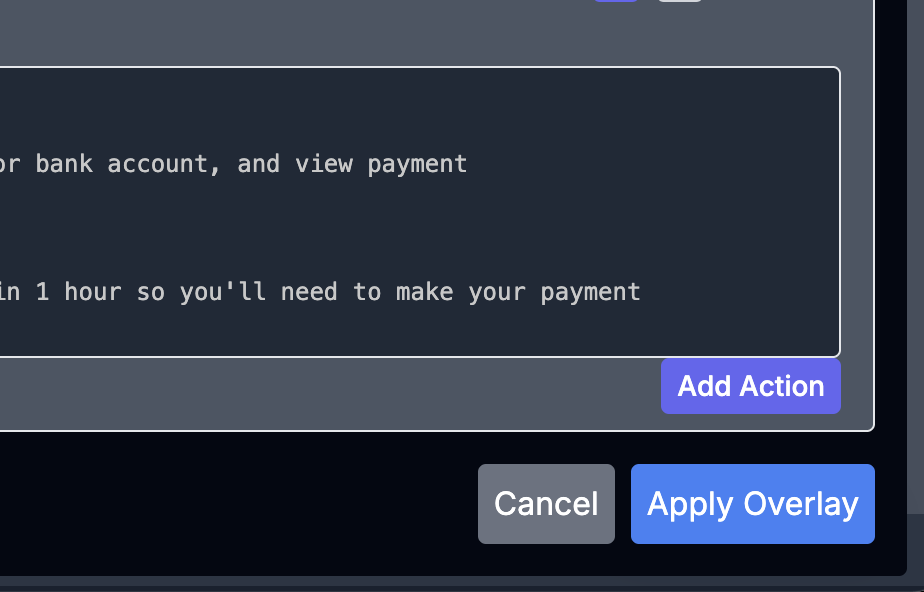
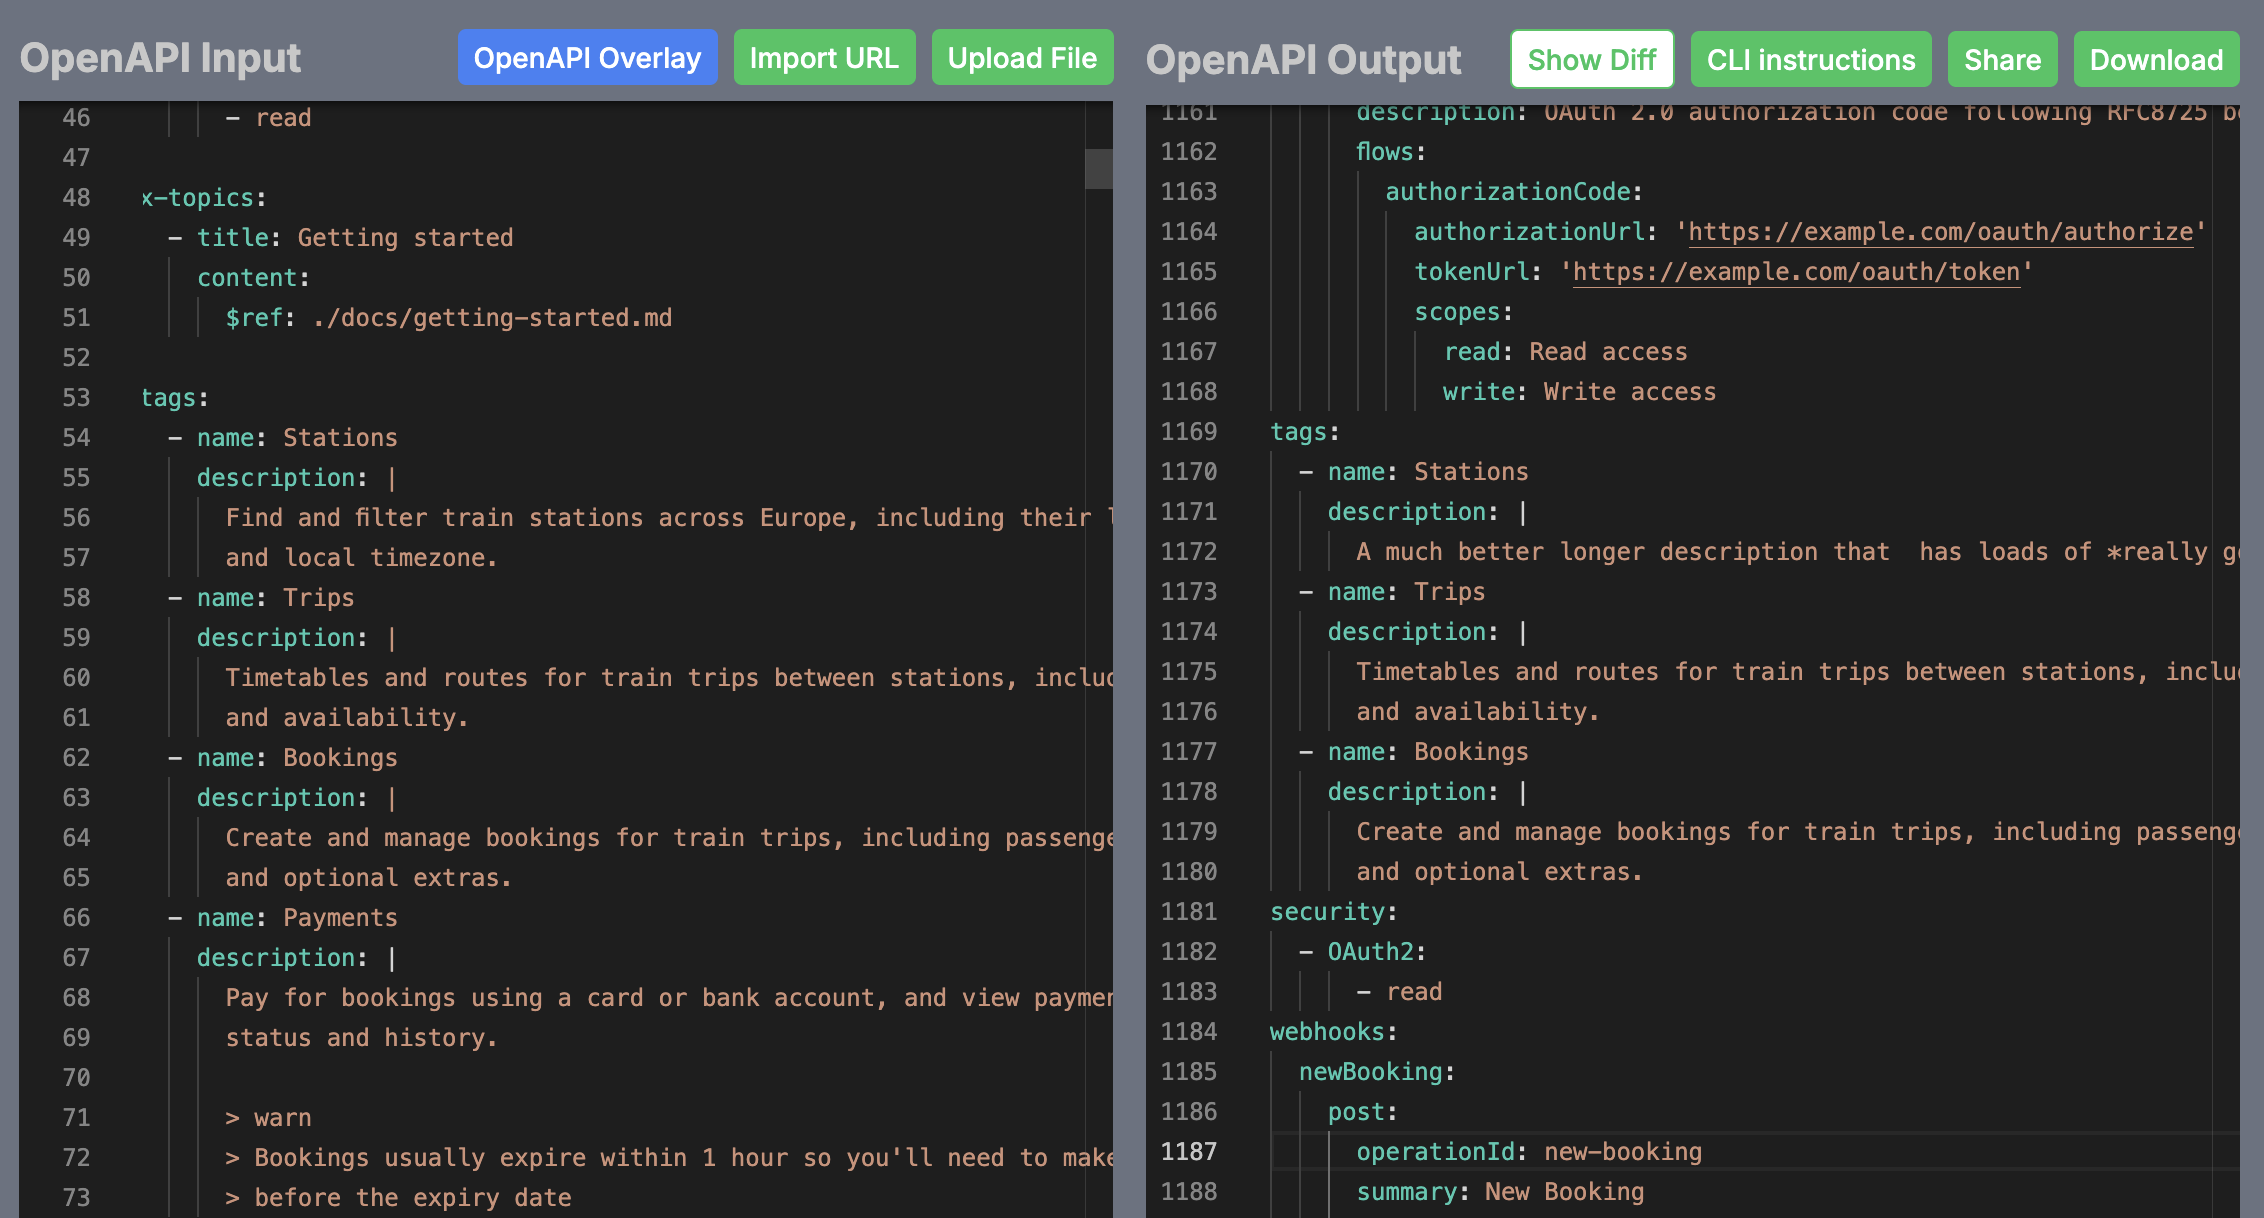
The main screen has OpenAPI input on the left and OpenAPI output on the right. The version on the right will have had the overlay applied as well as any other formatting rules, so we should see two changes to the tags: object:
- Stations has a wonderful new description.
- The Payments tag has vanished entirely.
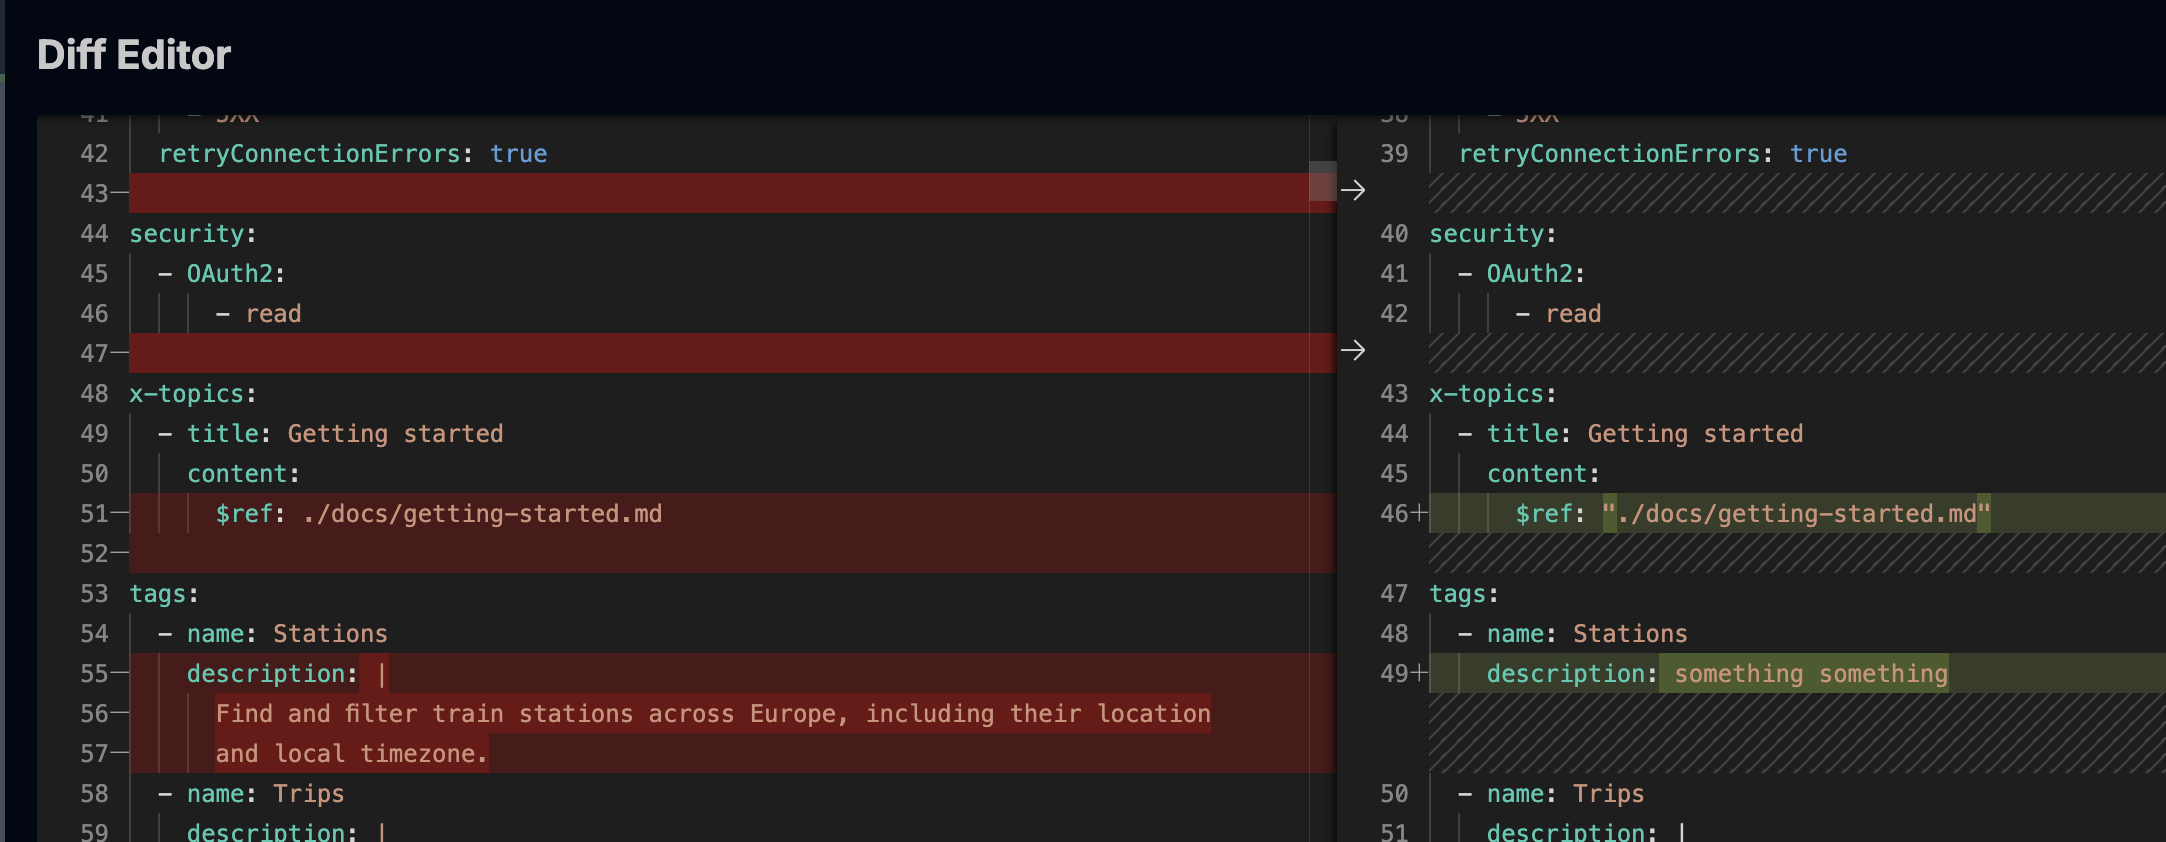
If its hard to see what has changed and you really want to be sure, you can click the Show Diff button to see the difference between the original OpenAPI document on the left, and the one with overlay changes on the right. Keep in mind that this will also show formatting changes, so there might be more changes than just the ones you made with the overlay.
Now you can keep iterating on the overlays you want to build, keep trying them out in this playground, then when its working nicely go back to the Overlay screen and click “Download Overlay”.
Bonus: Editing/Debugging Overlays #
Once overlays are out and about in the world they will sometimes need improving or debugging to make sure everything works as expected.
OpenAPI Format will allow you to import an Overlay from a file or a URL, and you could even “Switch to Code Mode” and paste the raw YAML of an overlay into the editor.
OpenAPI Format is a brilliant tool for helping teams get started with overlays, without forcing them to stare into an empty text-editor and try to learn Overlays and JSONPath all at once. Technical writers and others can use Playground to create overlays to improve API documentation in countless ways. How will you use them?