Mocking APIs with Microcks
You’ve created beautiful documentation for your API with Bump.sh, powered by OpenAPI, what’s next? If you’ve been following the API design-first workflow the next phase is gathering feedback on the proposed design before investing loads of time building it.
Sharing the documentation is a good start, but you can get even better feedback by giving stakeholders a mock server to interact with. A mock server simulates an API, allowing stakeholders to see if all the data they need is available, and give feedback on how easily their workflows can be solved based on the endpoints in the API. This can be thought of like a study group, something user researchers are used to doing for frontends, but is just as valuable for APIs.
This used to be done with “prototypes” or manually made mock servers, but seeing as Bump.sh users have already got the API described entirely by OpenAPI already, setting up mock servers is a whole lot easier using OpenAPI-powered tools like Microcks to do the hard work for you. Using OpenAPI instead of code means changes can be made to the mock server far quicker than getting the API developments to change loads of code.
Let’s take a look at using Microcks specifically, and see how we can tie it into your existing Bump.sh documentation.
Step 1: Set up Microcks locally #
Microcks is a Java (Spring Boot) application, which comes packaged as a Docker container, so it can be deployed anywhere either of those environments are happy. Setting it up locally is probably the first step to see how it works.
Whether you use Docker or prefer Podman, grab one of those applications to install Microcks within a container.
Assuming you’ve got Docker installed and running, you can use following command to get Microcks running on your computer.
docker run -p 8585:8080 -it --rm quay.io/microcks/microcks-uber:latest-native
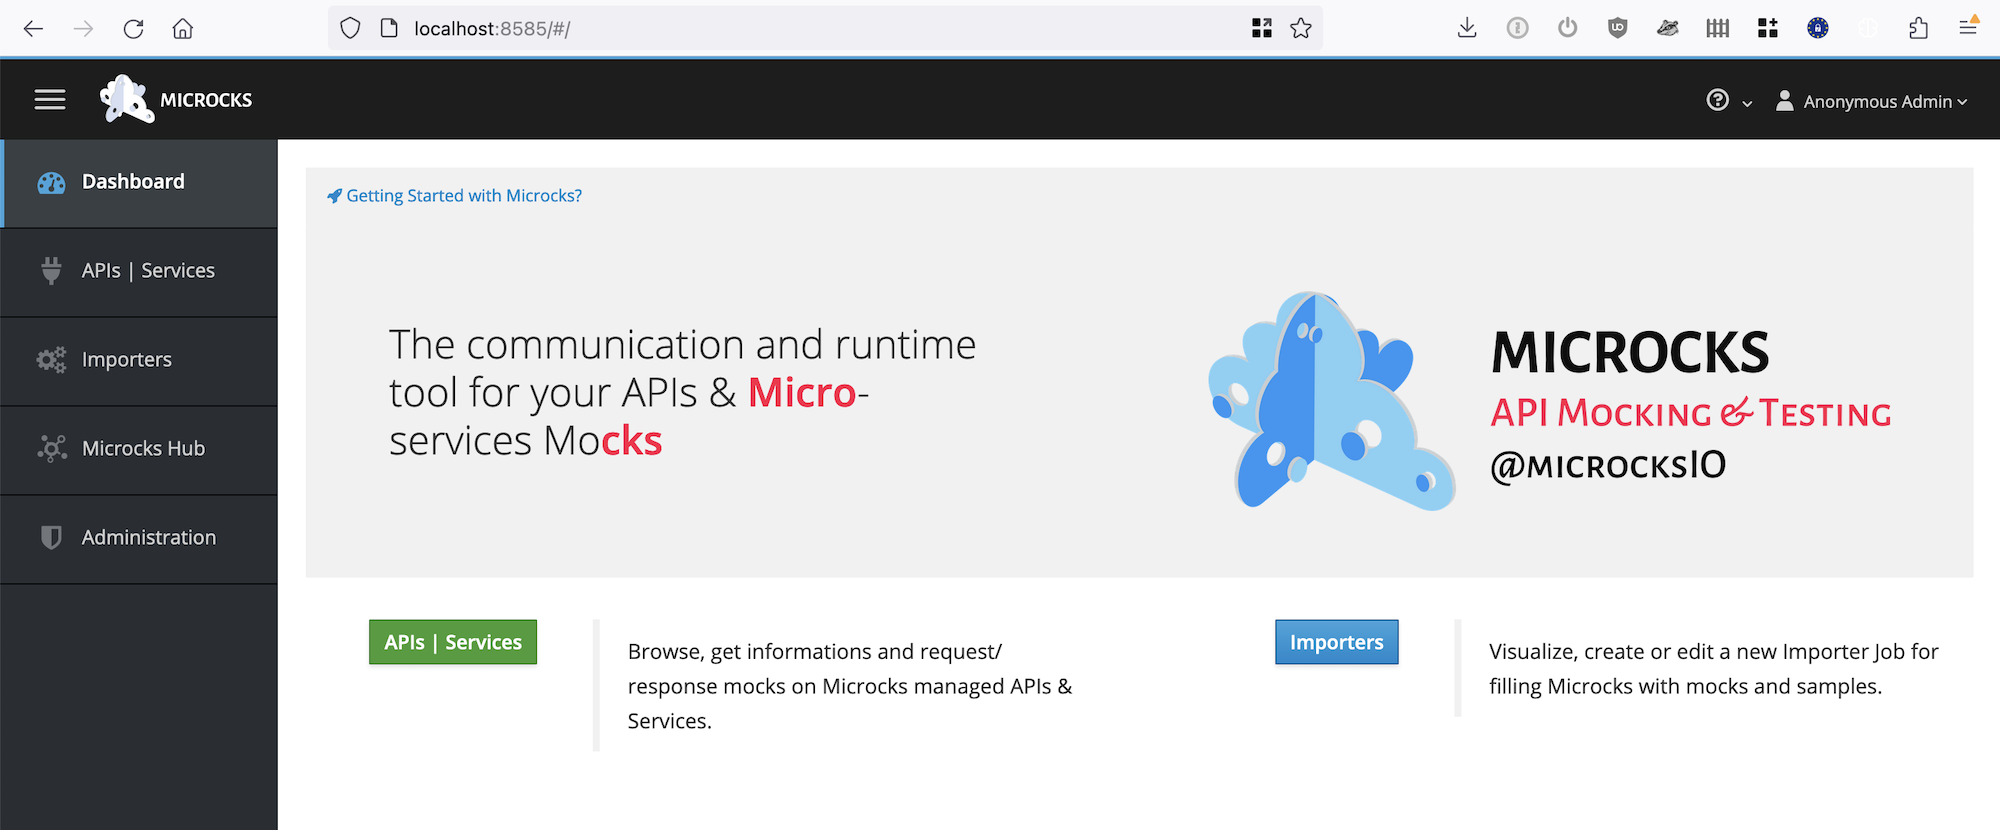
When that’s done, open a browser tab and point to the http://localhost:8585 endpoint, changing the port if you picked a different one.
Step 2: Add Your First API #
There are several ways to get OpenAPI into Microcks, but for the sake of simplicity we’re going to use the web interface to upload your OpenAPI. If you are just starting out and don’t have any OpenAPI yet, why not use the Train Travel API for now.
Once we’ve got Microcks loaded in the browser, click on “Importers”, and click the “Upload” button.
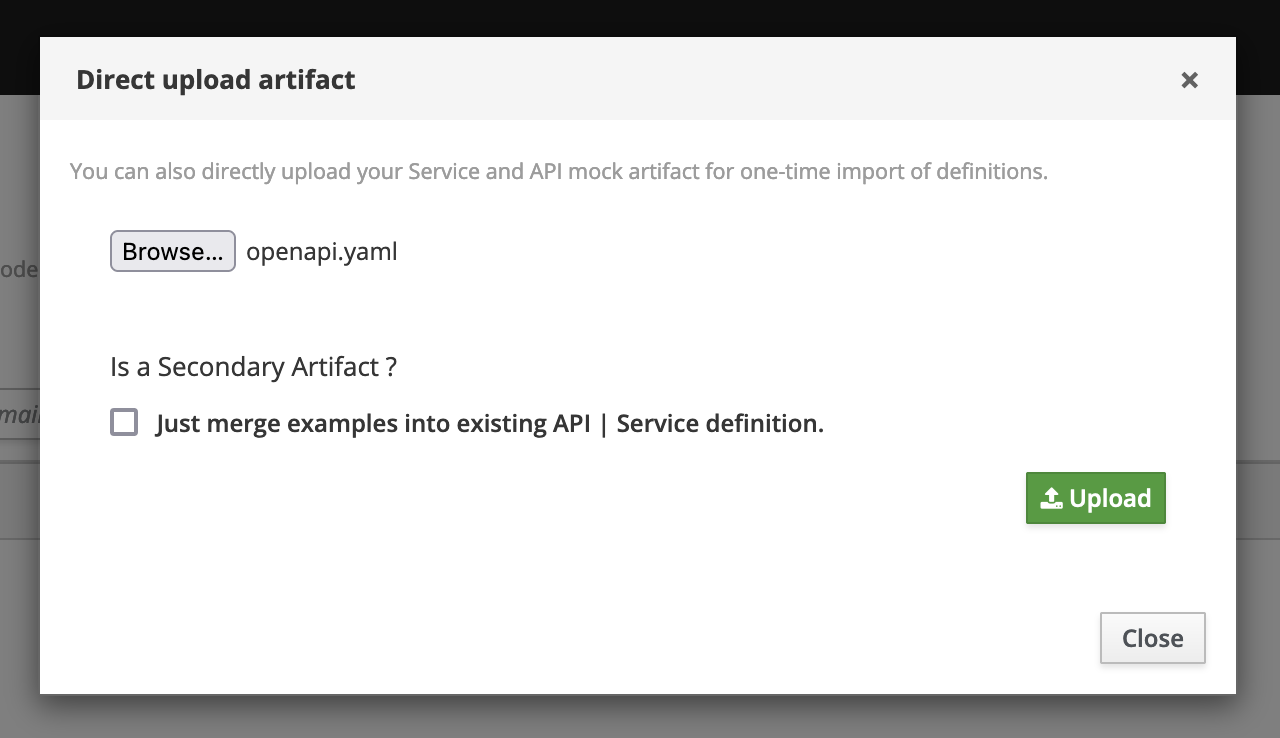
The modal that pops up is asking for an Artifact, which is referring to various documents that could describe an API, like a Postman Collection and other API description documents. We can pop our OpenAPI in there, which is the same openapi.yaml document that you deploy to Bump.sh.
The question about primary or secondary artifacts can be ignored for now.

Once you’ve uploaded, go to “APIs / Services” and click on your new API, which should have the same name as whatever was in the info.title of your OpenAPI. Below it you’ll see a bunch of operations, which are all the endpoints that Microcks found in your OpenAPI.
Step 3: Try out the Mock Endpoints #
Open up one of the operations and see what Microcks thinks about it.
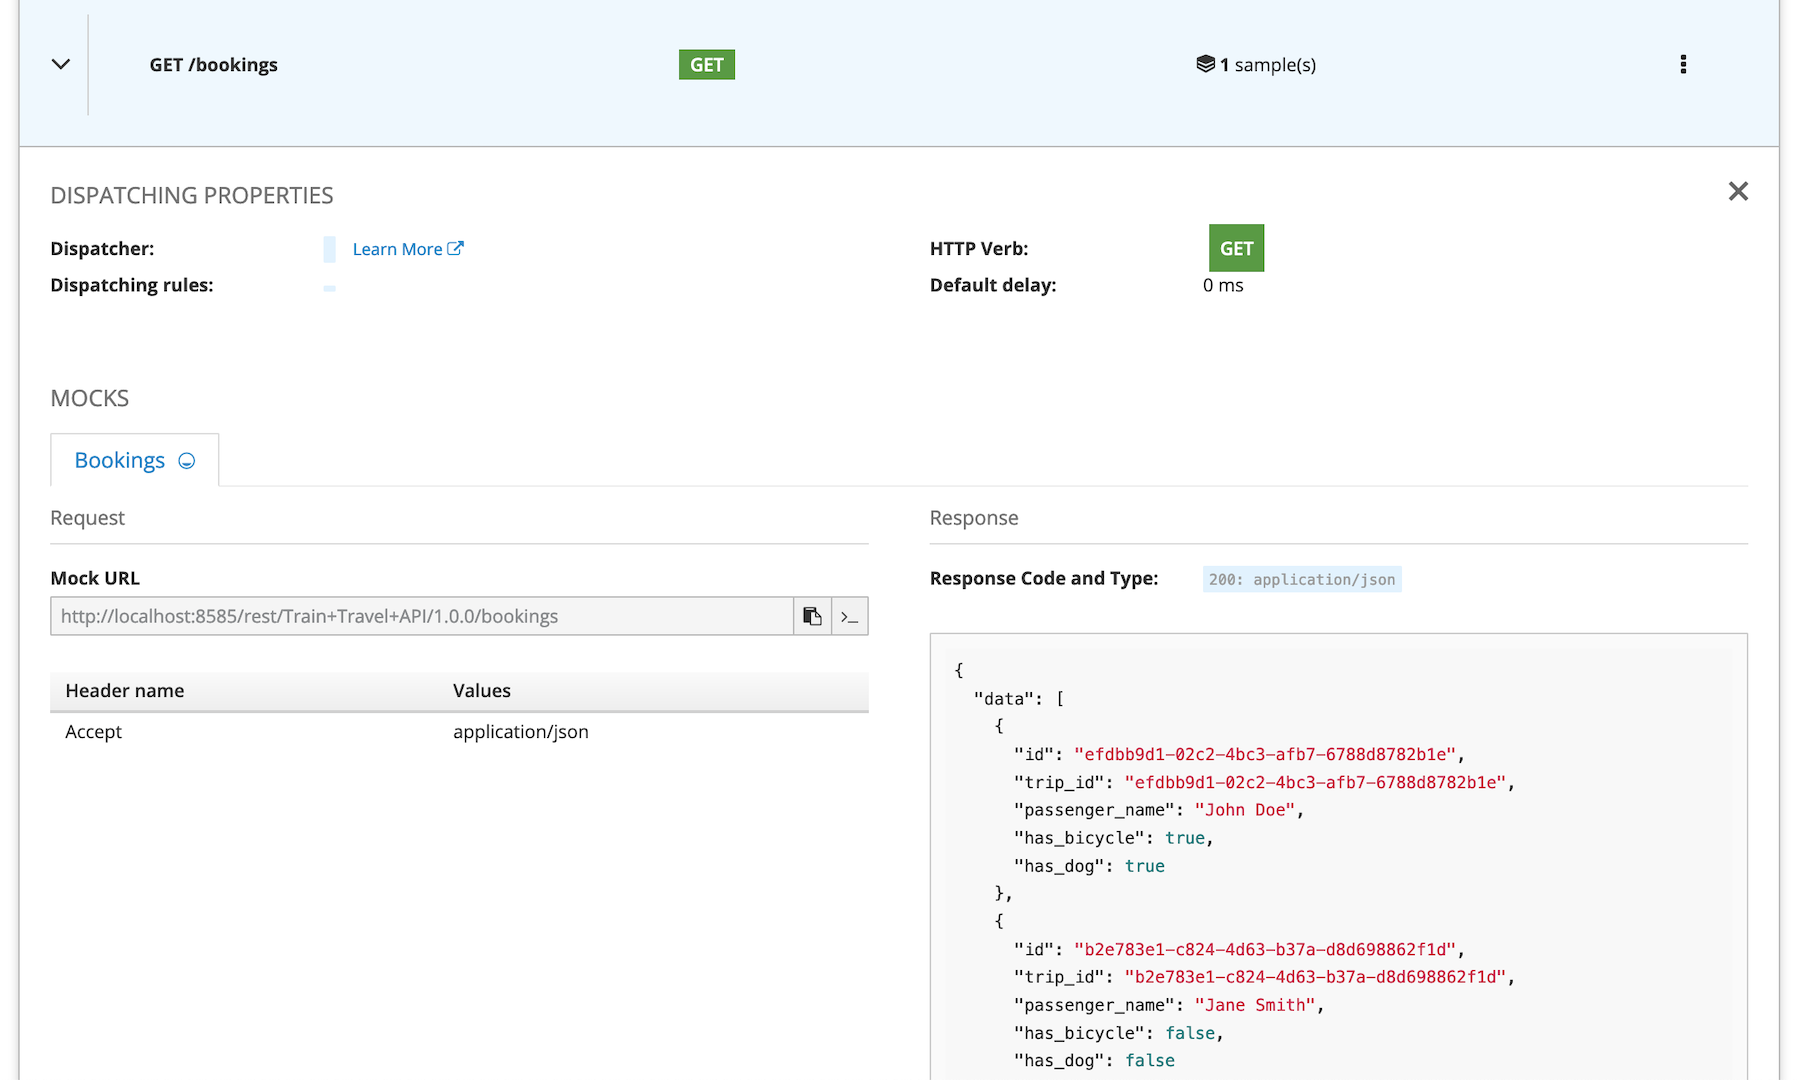
You should see a URL which you can copy, and the sample JSON it has pulled from the OpenAPI examples object.
http://localhost:8585/rest/Train+Travel+API/1.0.0/bookings
It’s basically:
<wherever microcks is running>/rest/<info.name>/<info.version>/<operation path>
If that operation has a GET method defined you can copy a curl command that’ll look something like this:
curl -X GET 'http://localhost:8585/rest/Train+Travel+API/1.0.0/bookings' -H 'Accept: application/json'
Running this command will then return the sample Microcks was showing the web interface.
{
  "data": [
    {
      "id": "bfc5af2c-f477-43c4-8bdf-a00bdb939d65",
      "trip_id": "efdbb9d1-02c2-4bc3-afb7-6788d8782b1e",
      "passenger_name": "John Doe",
      "has_bicycle": true,
      "has_dog": true
    },
    {
      "id": "b2e783e1-c824-4d63-b37a-d8d698862f1d",
      "trip_id": "b2e783e1-c824-4d63-b37a-d8d698862f1d",
      "passenger_name": "Jane Smith",
      "has_bicycle": false,
      "has_dog": false
    }
  ],
  "links": {
    "self": "https://api.example.com/bookings",
    "next": "https://api.example.com/bookings?page=2"
  }
}
Getting a collection is a handy first example, but next lets try working with resources.
Microcks uses examples with a particular naming convention, pairing up request examples and response examples with the same name. As a best practice, the naming convention could <resource>_<id>, so sticking with the Train Travel API, we could do this:
 /bookings/{bookingId}:
    get:
      summary: Get a booking
      operationId: get-booking
      parameters:
        - name: bookingId
          in: path
          required: true
          description: The ID of the booking to retrieve.
          schema:
            type: string
            format: uuid
          examples:
            booking_1725ff48-ab45-4bb5-9d02-88745177dedb:
              value: 1725ff48-ab45-4bb5-9d02-88745177dedb
            booking_bfc5af2c-f477-43c4-8bdf-a00bdb939d65:
              value: bfc5af2c-f477-43c4-8bdf-a00bdb939d65
      responses:
        '200':
          description: The booking details
          content:
            application/json:
              schema:
                $ref: '#/components/schemas/Booking'
              examples:
                booking_1725ff48-ab45-4bb5-9d02-88745177dedb:
                  summary: John Doe
                  value:
                    id: 1725ff48-ab45-4bb5-9d02-88745177dedb
                    trip_id: efdbb9d1-02c2-4bc3-afb7-6788d8782b1e
                    passenger_name: John Doe
                    has_bicycle: true
                    has_dog: true
                booking_bfc5af2c-f477-43c4-8bdf-a00bdb939d65:
                  summary: Billy Bikeless
                  value:
                    id: bfc5af2c-f477-43c4-8bdf-a00bdb939d65
                    trip_id: efdbb9d1-02c2-4bc3-afb7-6788d8782b1e
                    passenger_name: Billy Bikeless
                    has_bicycle: false
                    has_dog: true
Upload that to Microcks again and it will now be aware of these two examples, and show you the mock URLs for both.
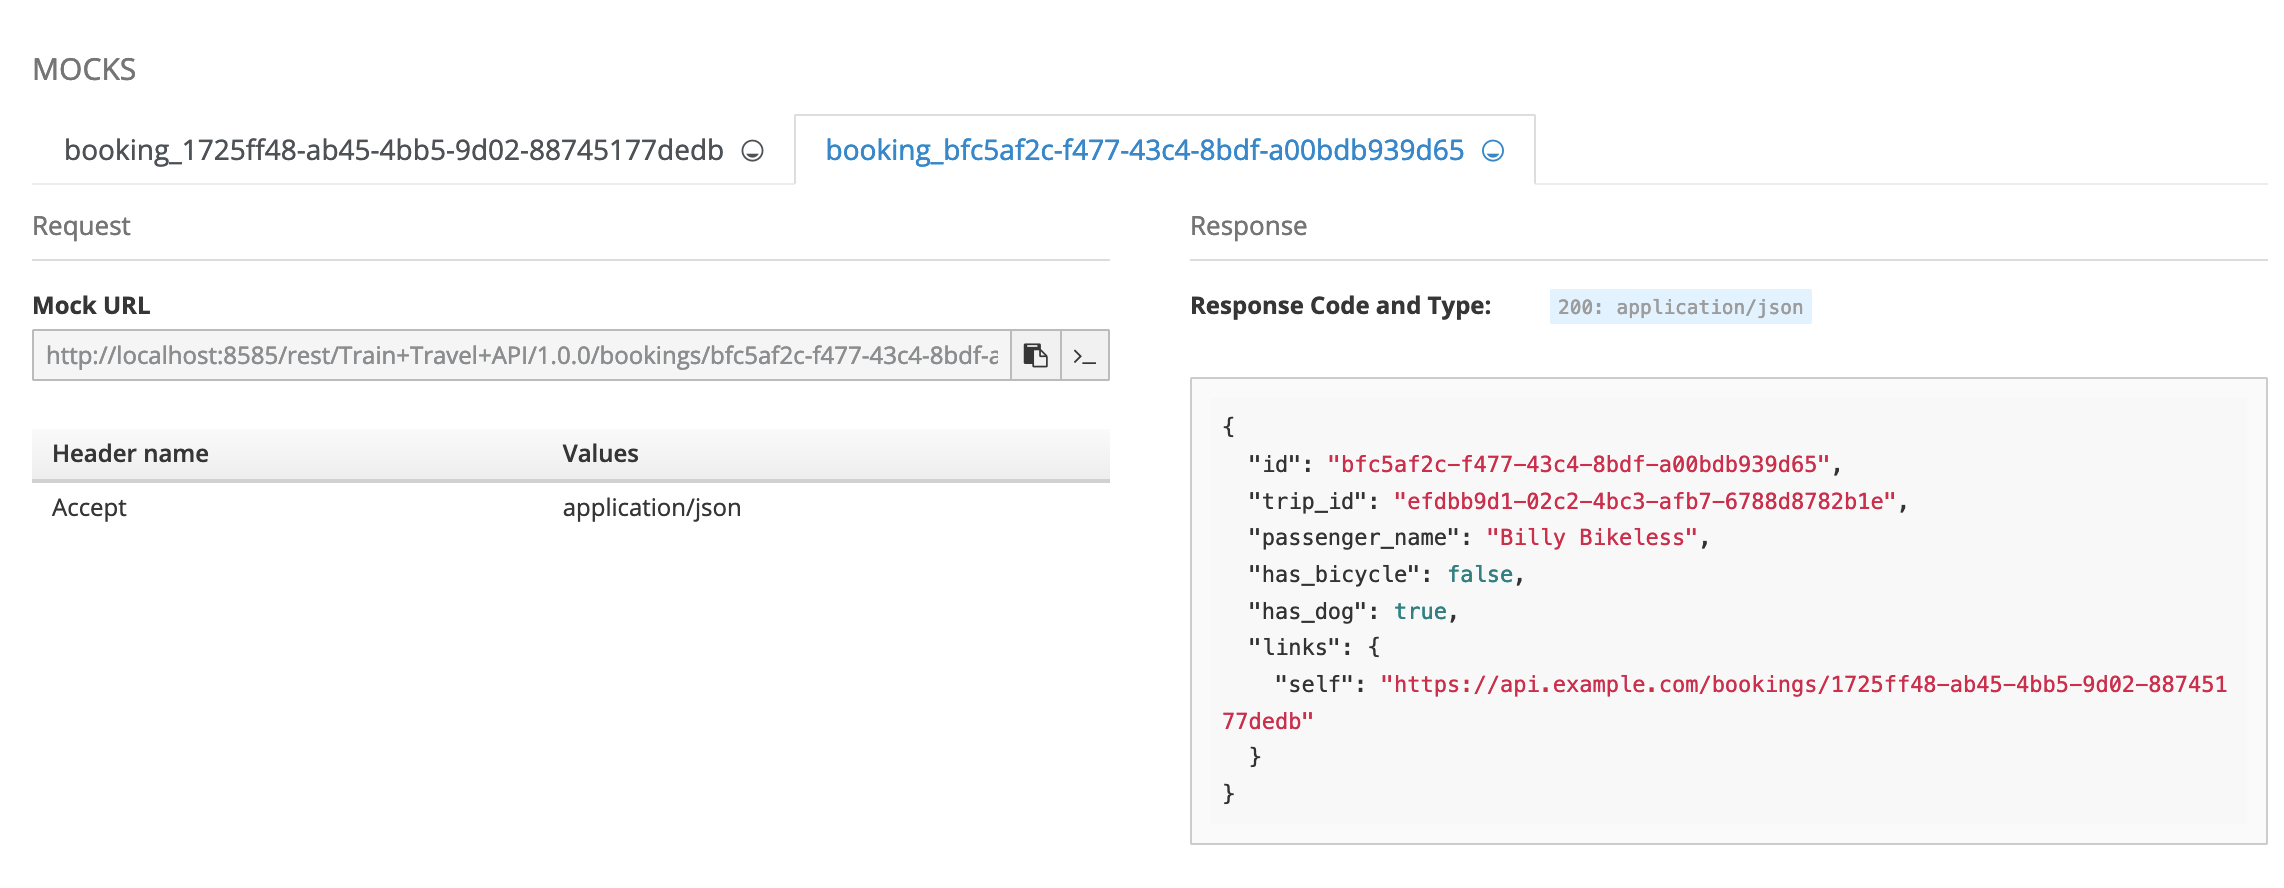
Now you can call either of them, and get different HTTP responses with the appropriate example data being used for each.
curl -X GET 'http://localhost:8585/rest/Train+Travel+API/1.0.0/bookings/1725ff48-ab45-4bb5-9d02-88745177dedb' -H 'Accept: application/json'

curl -X GET 'http://localhost:8585/rest/Train+Travel+API/1.0.0/bookings/bfc5af2c-f477-43c4-8bdf-a00bdb939d65' -H 'Accept: application/json'
This is already really useful, you could use this to build a read-only API client on your computer without needing the actual API to actually exist.
If you need to send POST, PUT or PATCH requests you can do that too. Let’s try sending a POST request. The “Copy to clipboard” functionality in Microcks won’t automatically give you a predefined request body, but pop back over to your Bump.sh API docs to get a better curl example and it should look a bit like this.
curl -X POST 'http://localhost:8585/rest/Train+Travel+API/1.0.0/bookings' \
  -H 'Accept: application/json' \
  -H 'Content-type: application/json' \
  -d '{"passenger_name":"New Passenger","has_bicycle":false,"has_dog":false,"trip_id":"4f4e4e1-c824-4d63-b37a-d8d698862f1d"}'
{
  "id": "efdbb9d1-02c2-4bc3-afb7-6788d8782b1e",
  "trip_id": "efdbb9d1-02c2-4bc3-afb7-6788d8782b1e",
  "passenger_name": "John Doe",
  "has_bicycle": true,
  "has_dog": true,
  "links": {
    "self": "https://api.example.com/bookings/efdbb9d1-02c2-4bc3-afb7-6788d8782b1e"
  }
}
That’s somewhat handy, but it’s showing me a generic response instead of the data sent in the POST request. Named examples would not help here, as we want to use client data from the request body and not just show predetermined examples. How can we have New Passenger instead of John Doe, and how can we see the actual trip_id instead of the default one?
Step 4: Customizing Responses #
Mocks can be made more powerful with dynamic mocking, which is made possible through Microcks’ templating system. Using a combination of predefined variables, built-in functions, and some JSON Pointers, we can provide a dynamic example in OpenAPI which put together a more useful response.
responses:
  '201':
    description: Booking successful
    content:
      application/json:
        schema:
          # snip
        examples:
          new_booking:
            summary: New Booking
            value: |-
              {
                "id": "{{ uuid() }}",
                "trip_id": "{{ request.body/trip_id }}",
                "passenger_name": "{{ request.body/passenger_name }}",
                "has_bicycle": {{ request.body/has_bicycle }},
                "has_dog": {{ request.body/has_dog }},
                "links": {
                  "self": "https://api.example.com/bookings/1725ff48-ab45-4bb5-9d02-88745177dedb"
                }
              }
Go back to Importers, Upload the openapi.yaml document again, and it will merge changes into API so we can see how they look.
**curl** -X POST 'http://localhost:8585/rest/Train+Travel+API/1.0.0/bookings' \
  -H 'Accept: application/json' \
  -H 'Content-type: application/json' \
  -d '{"passenger_name":"New Passenger","has_bicycle":false,"has_dog":false,"trip_id":"4f4e4e1-c824-4d63-b37a-d8d698862f1d"}'
Now we will see the values we sent showing back up, and the computed random UUID.
{
  "id": "a248a638-000a-44b4-b19b-0ca30507a940",
  "trip_id": "4f4e4e1-c824-4d63-b37a-d8d698862f1d",
  "passenger_name": "New Passenger",
  "has_bicycle": false,
  "has_dog": false,
  "links": {
    "self": "https://api.example.com/bookings/1725ff48-ab45-4bb5-9d02-88745177dedb"
  }
}
Finally, that HATEOAS link at the bottom there is not right. The id is a248a638-000a-44b4-b19b-0ca30507a940, so how can we get that showing up in the link? If we used {{ uuid() }} again it would be generate a second different UUID, Microcks templating has a brilliant feature called capture.
examples:
  new_booking:
    summary: New Booking
    value: |-
      {
        "id": "{{ uuid() > put(bookingId) }}",
        "trip_id": "{{ request.body/trip_id }}",
        "passenger_name": "{{ request.body/passenger_name }}",
        "has_bicycle": {{ request.body/has_bicycle }},
        "has_dog": {{ request.body/has_dog }},
        "links": {
          "self": "https://api.example.com/bookings/{{ bookingId }}"
        }
      }
Upload that again. Run the command again.
{
  "id": "b4441c3d-b659-4f57-95d3-ce6ee592da7c",
  "trip_id": "4f4e4e1-c824-4d63-b37a-d8d698862f1d",
  "passenger_name": "New Passenger",
  "has_bicycle": false,
  "has_dog": false,
  "links": {
    "self": "https://api.example.com/bookings/b4441c3d-b659-4f57-95d3-ce6ee592da7c"
  }
}
Perfect! Now you can do almost anything you need to do with the API.
Step 5: Deploy Microcks Somewhere #
Working with Microcks locally was an OK way to get the hang of it, and could be useful for some solo developers, but the chances are you’ll want to get this off your laptop and share it with people.
You can deploy Microcks anywhere that takes Docker/Kubernetes instances, and they have lots of documentation on your deployment options for Microcks.
One approach is to deploy the Docker container into a managed Kubernetes cluster on Google Kubernetes Engine, which has free trials and free tiers to ease you into the process.
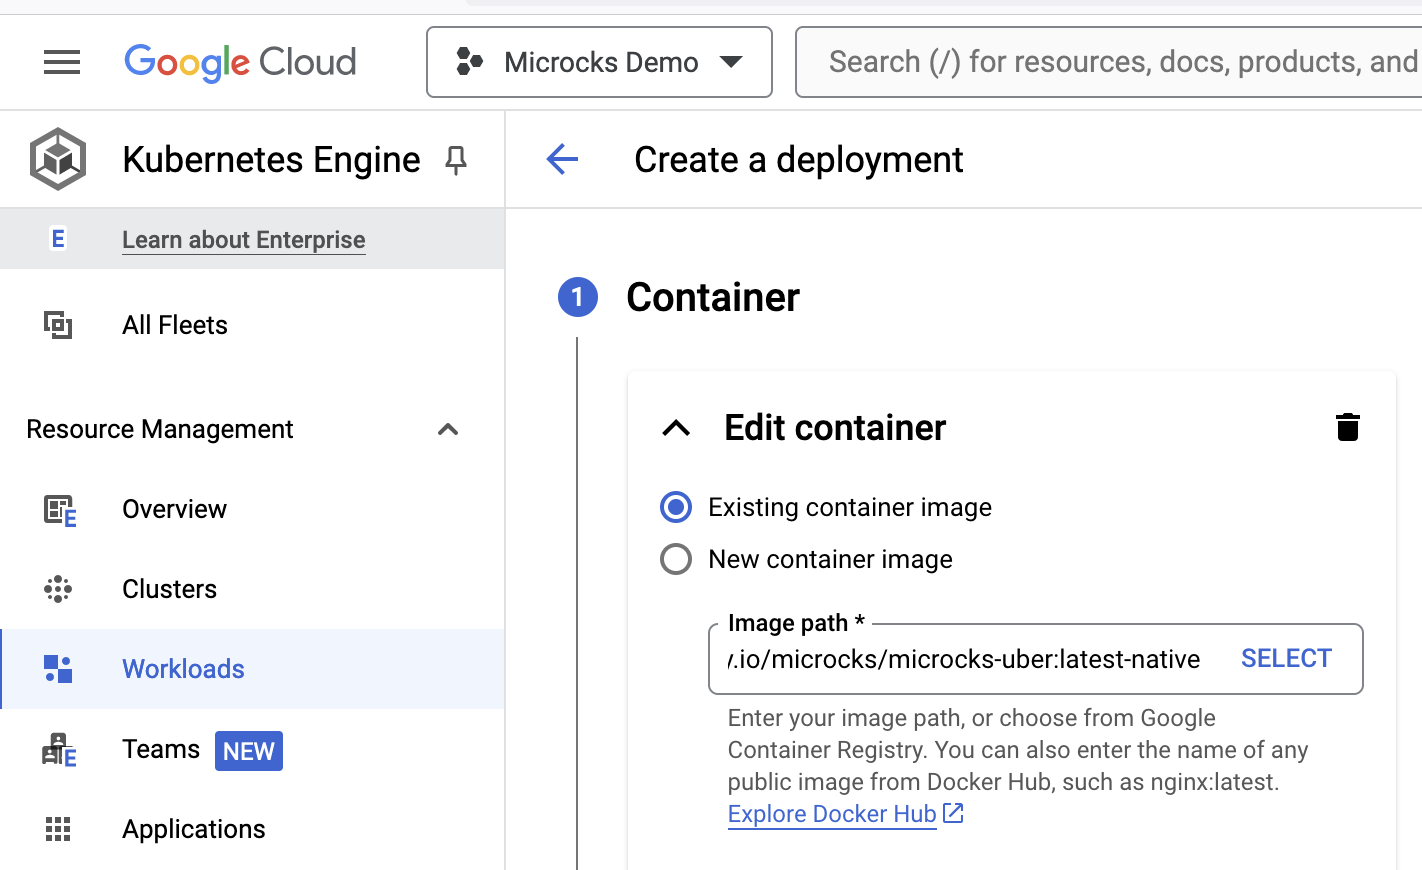
This puts Microcks behind a publicly accessible load balancer, so you can stick some DNS on it and have everyone able to call the hosted version of the mock server.
curl -X GET 'https://mocks.example.com/rest/Train+Travel+API/1.0.0/bookings'
Once this is done we can replace the manual uploads with some automatic solutions too.
Step 6: Automate Mock Updates #
Most Bump.sh users use some form of Continuous Integration (CircleCI, GitHub Actions, Jenkins, etc.) to push changes to their API documentation whenever the source code is changed, and you can work this way with Microcks, or there are some alternatives you can try out.
Update Mocks with Continuous Integration #
Below is the standard GitHub Action used to deploy API changes to Bump.sh with one modification to also deploy changes to your Microcks server.
# .github/workflows/deploy-docs.yml
name: Deploy API documentation

on:
  push:
    branches:
      - main

jobs:
  deploy-openapi:
    if: ${{ github.event_name == 'push' }}
    name: Deploy API documentation on Bump.sh
    runs-on: ubuntu-latest
    steps:
      - name: Checkout
        uses: actions/checkout@v3

      - name: Deploy API documentation
        uses: bump-sh/github-action@v1
        with:
          doc: 68ac0647-184a-4e9d-accc-682a5b1f7189
          token: ${{secrets.BUMP_TOKEN}}
          file: api/openapi.yaml

      - uses: microcks/import-github-action@v1
        with:
          specificationFiles: 'api/openapi.yaml:true'
          microcksURL: 'https://mocks.example.com/api/'
          keycloakClientId:  ${{ secrets.MICROCKS_SERVICE_ACCOUNT }}
          keycloakClientSecret:  ${{ secrets.MICROCKS_SERVICE_ACCOUNT_CREDENTIALS }}
You’ll need to set up some secrets on your repository for that Microcks service account, but then you’re done! A fully functioning mock server running on the cloud, which you can interact with internally or externally depending on how you set it up.
Learn more about Microcks Automation to see how to push updates to Microcks using other CI systems, via the API, or using the CLI elsewhere. You can also use the Microcks Scheduler instead, to pull content from a repo on a regular schedule instead of pushing.
Step 7: Add Mock Server to API Documentation #
Once the mock server is up and running, you can help make it easier to find by adding it to your Bump.sh API documentation. To do this, we can add the server URL into the servers list like this:
servers:
  - url: https://api.example.com
    description: Production

  - url: https://mocks.example.com/rest
    description: Mock Server
Adding this second server URL will offer users a dropdown menu in the Bump.sh documentation.
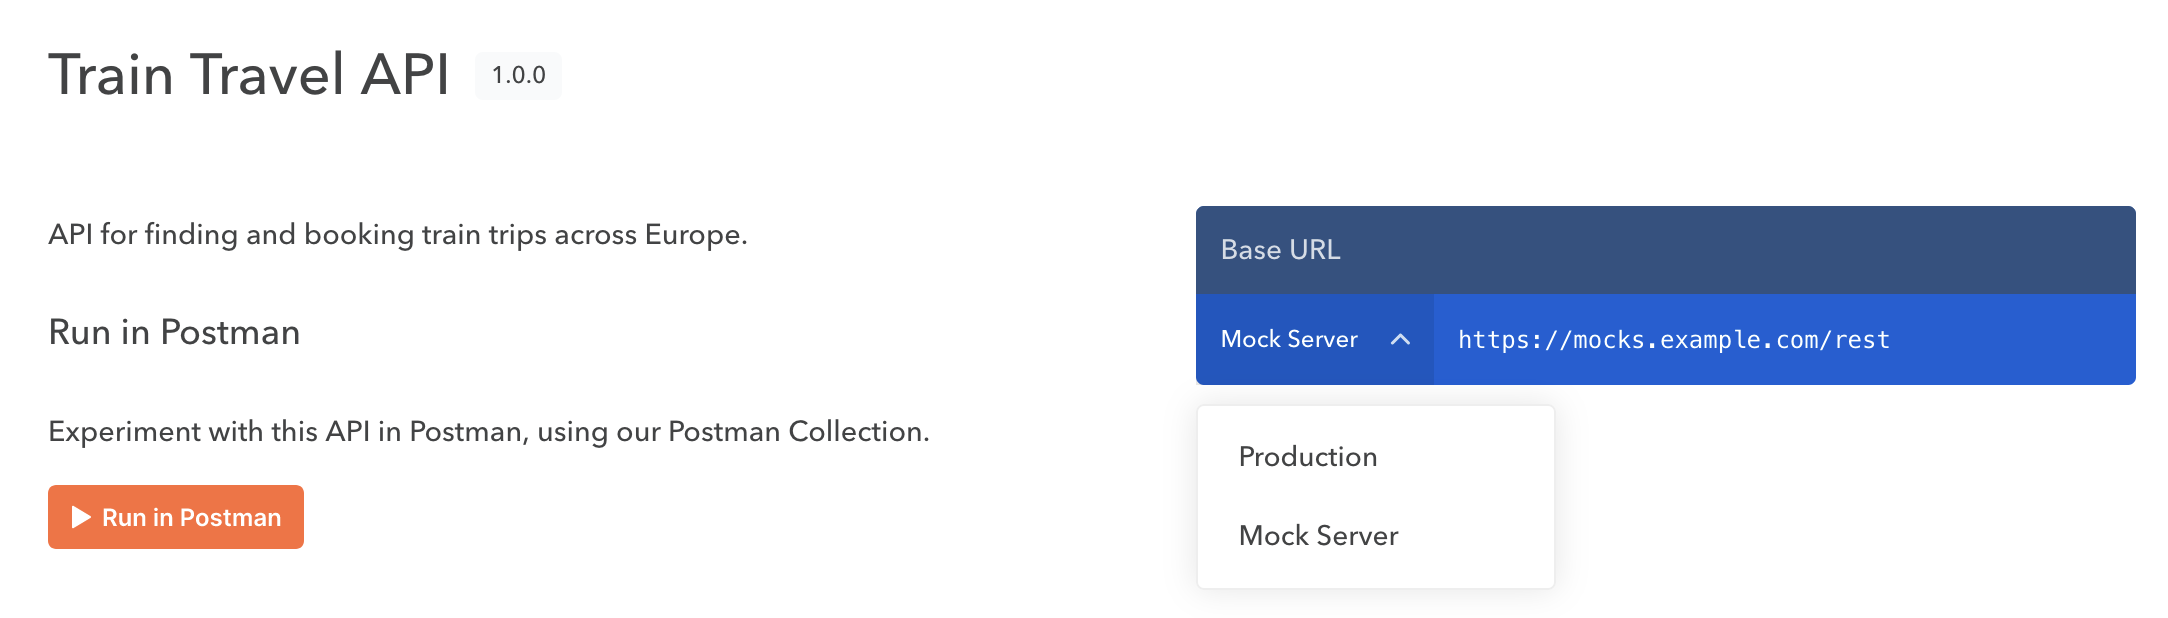
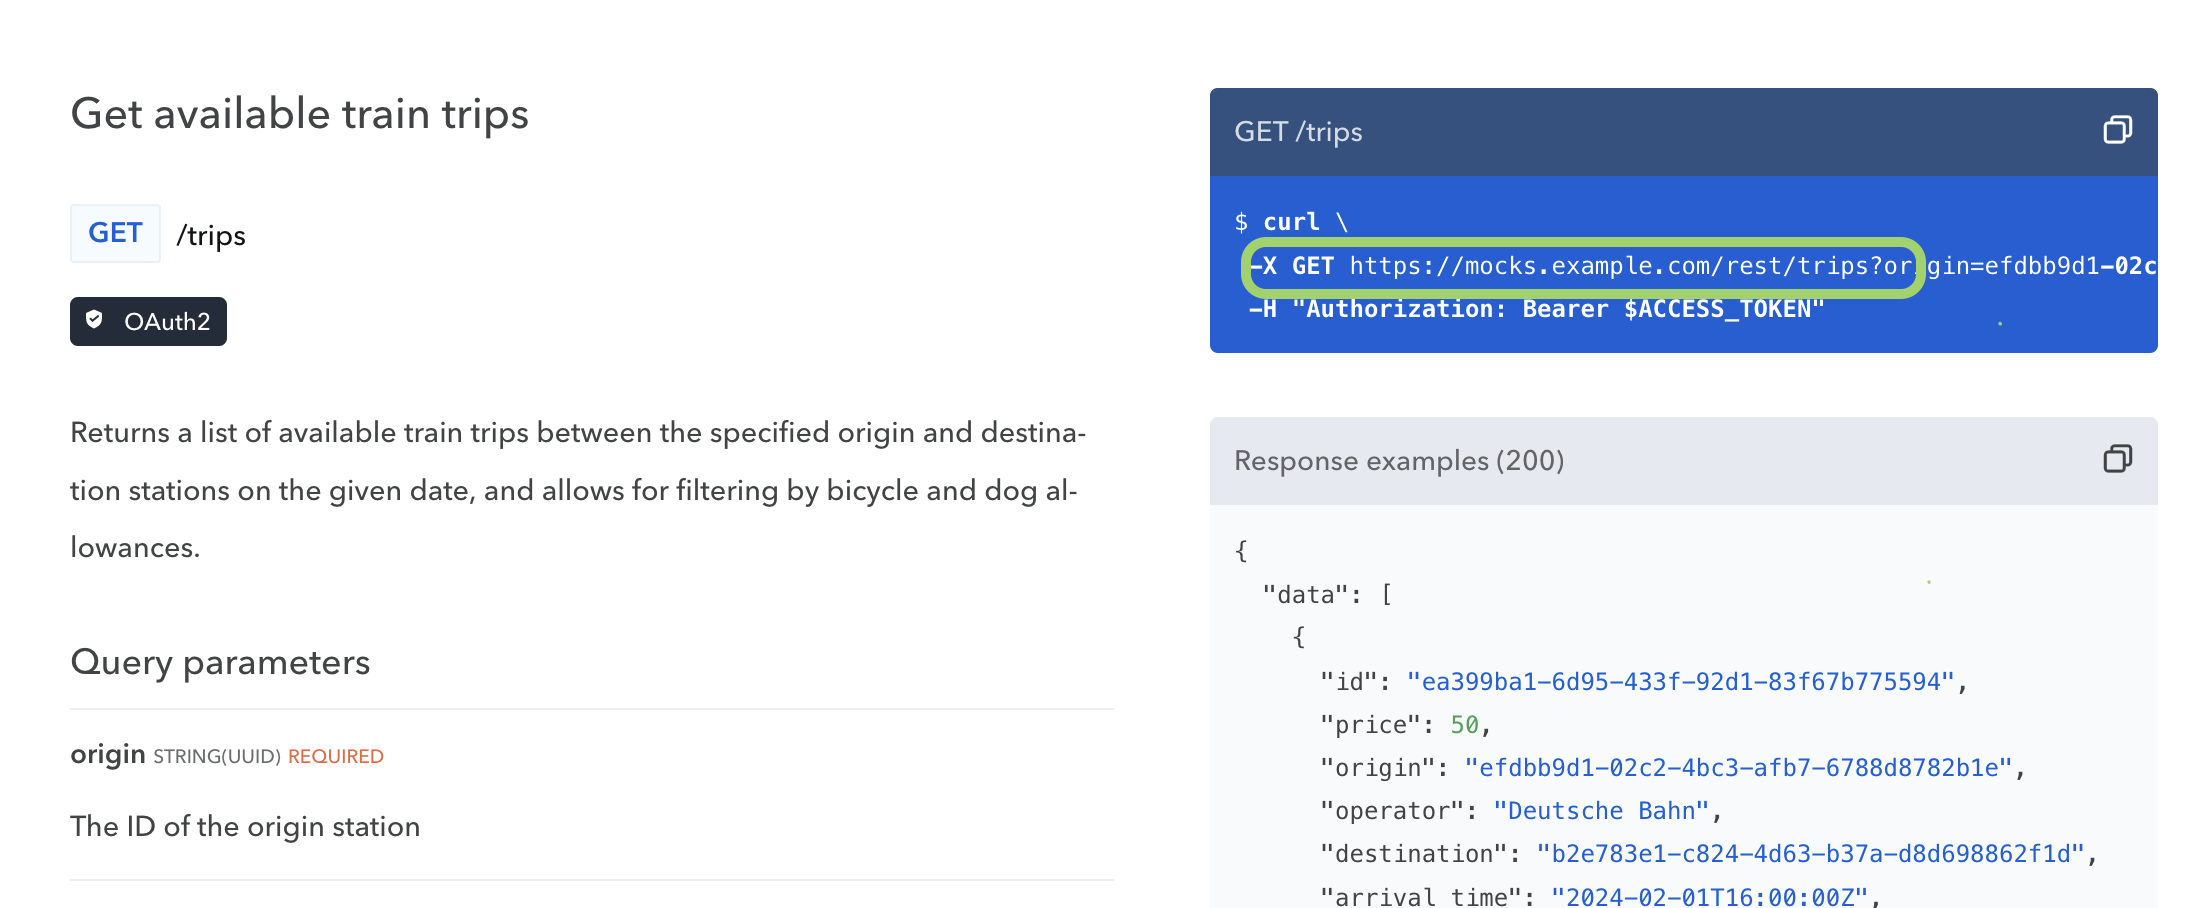
The mock server is now an option, and all of the URLs and example HTTP requests will show up using the chosen server URL.
If there’s no production API only the mock server is ready then only define that:
servers:
  - url: https://mocks.example.com/rest
    description: Mock Server
Perhaps you cannot update the OpenAPI document to get that server added as it’s generated by somebody else or hosted online, in which case take a look at our Overlays guide.