Migrate from SwaggerHub
Tools like SwaggerHub provide an editing and hosting experience for OpenAPI documents, allowing teams to fork APIs, add new versions, diff, and compare, which was pretty handy back in the day. These days it can feel like recreating Git with a walled-garden, needing to be imported and exported, or joined together with “integrations” that involve manually setting up webhooks to ping your other tools when there are changes. Many teams are starting to question how useful that is.
Bump.sh gives teams more flexibility in how they work, but the most common workflow assumes that your OpenAPI is your source of truth, and that source of truth lives with the source code in Git, so instead of managing source code and OpenAPI separately you have it all in the same pull requests as you go. Your documentation can still be published immediately on changes, but it all happens from your Git repository or CI/CD setup as a central point, instead of being stuck in somebody elses server.
Step 1: Export OpenAPI from SwaggerHub #
To liberate your OpenAPI from SwaggerHub for good, head to “My Hub”, open each API one at a time, then click “Export” > “Download API” > “YAML Unresolved”.
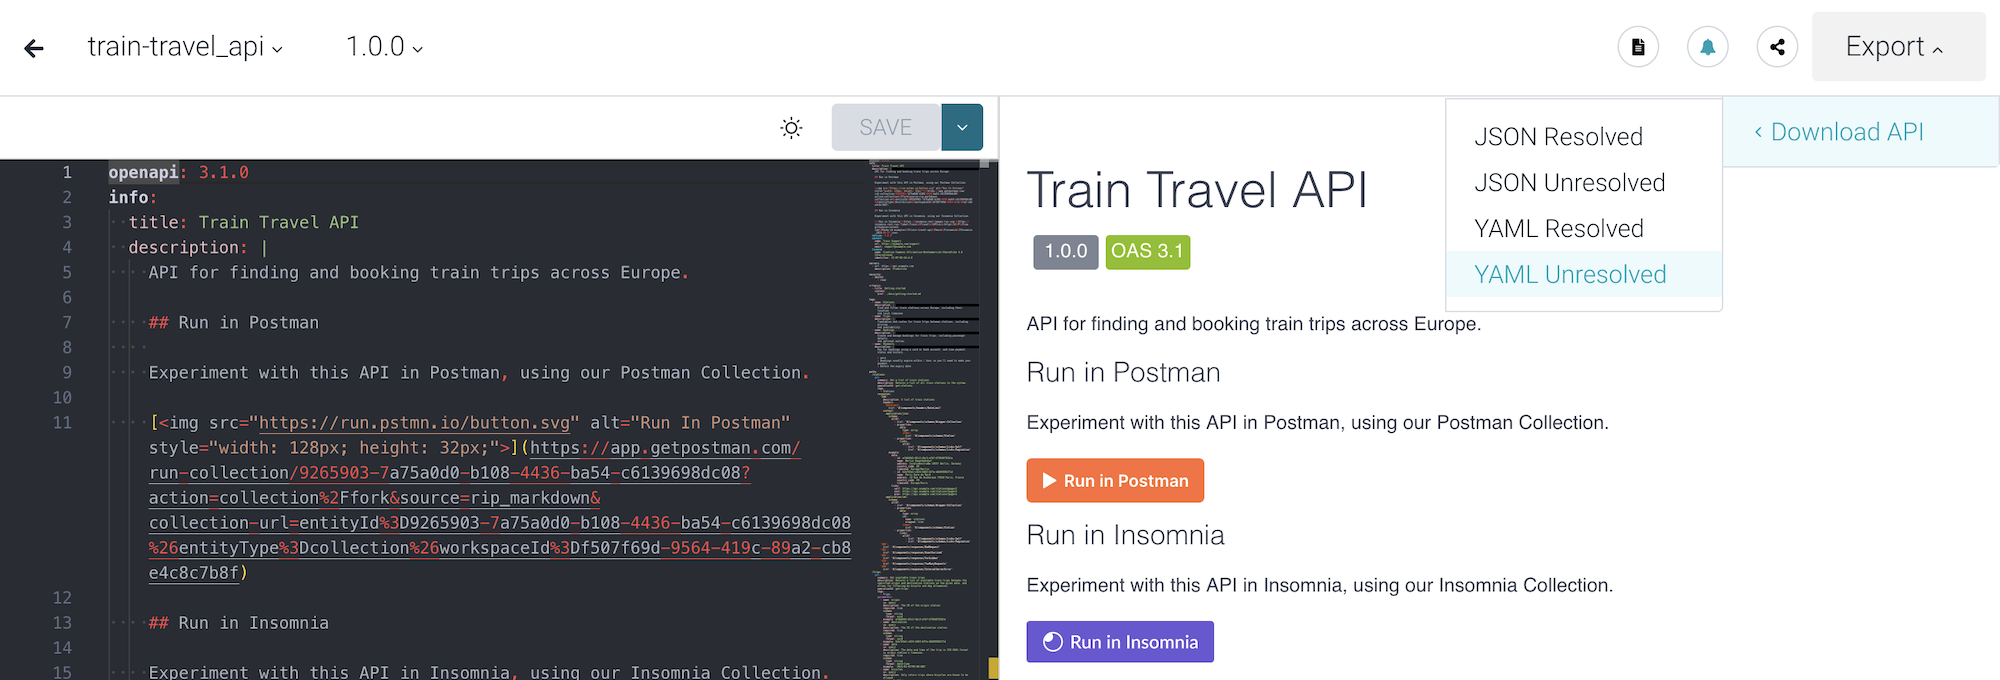
This will download a version which still has $ref’s, which will keep the file size smaller and avoid duplication of components.
Now pop the downloaded OpenAPI into your source code repository, and give it a tidy name in the process.
mv ~/Downloads/ME_10-train-travel_api-1.0.0-swagger.yaml ~/src/train-travel-api/openapi.yaml
Now you can add this OpenAPI to your source control, which assuming Git is a case of:
cd ~/src/train-travel-api

git add openapi.yaml

git commit -m "docs: imported openapi"
Step 2: Setting up an OpenAPI Editor #
One thing that SwaggerHub does well is providing an OpenAPI editing experience. Users write YAML/JSON in an editor window on the left, and see a preview of that OpenAPI as documentation on the right. This gives new users of OpenAPI more confidence, because they can see their changes as they work on it.
Using open-source tooling can provide this exact same experience, easier, cheaper, and more powerful, without needing to pay for a hosted service. Whatever your favorite IDE or text-editor, there’s an OpenAPI extension you can use to bring in that preview experience on your development machine.
VS Code OpenAPI Extension #
VS Code users have a variety of popular extensions to chose from.
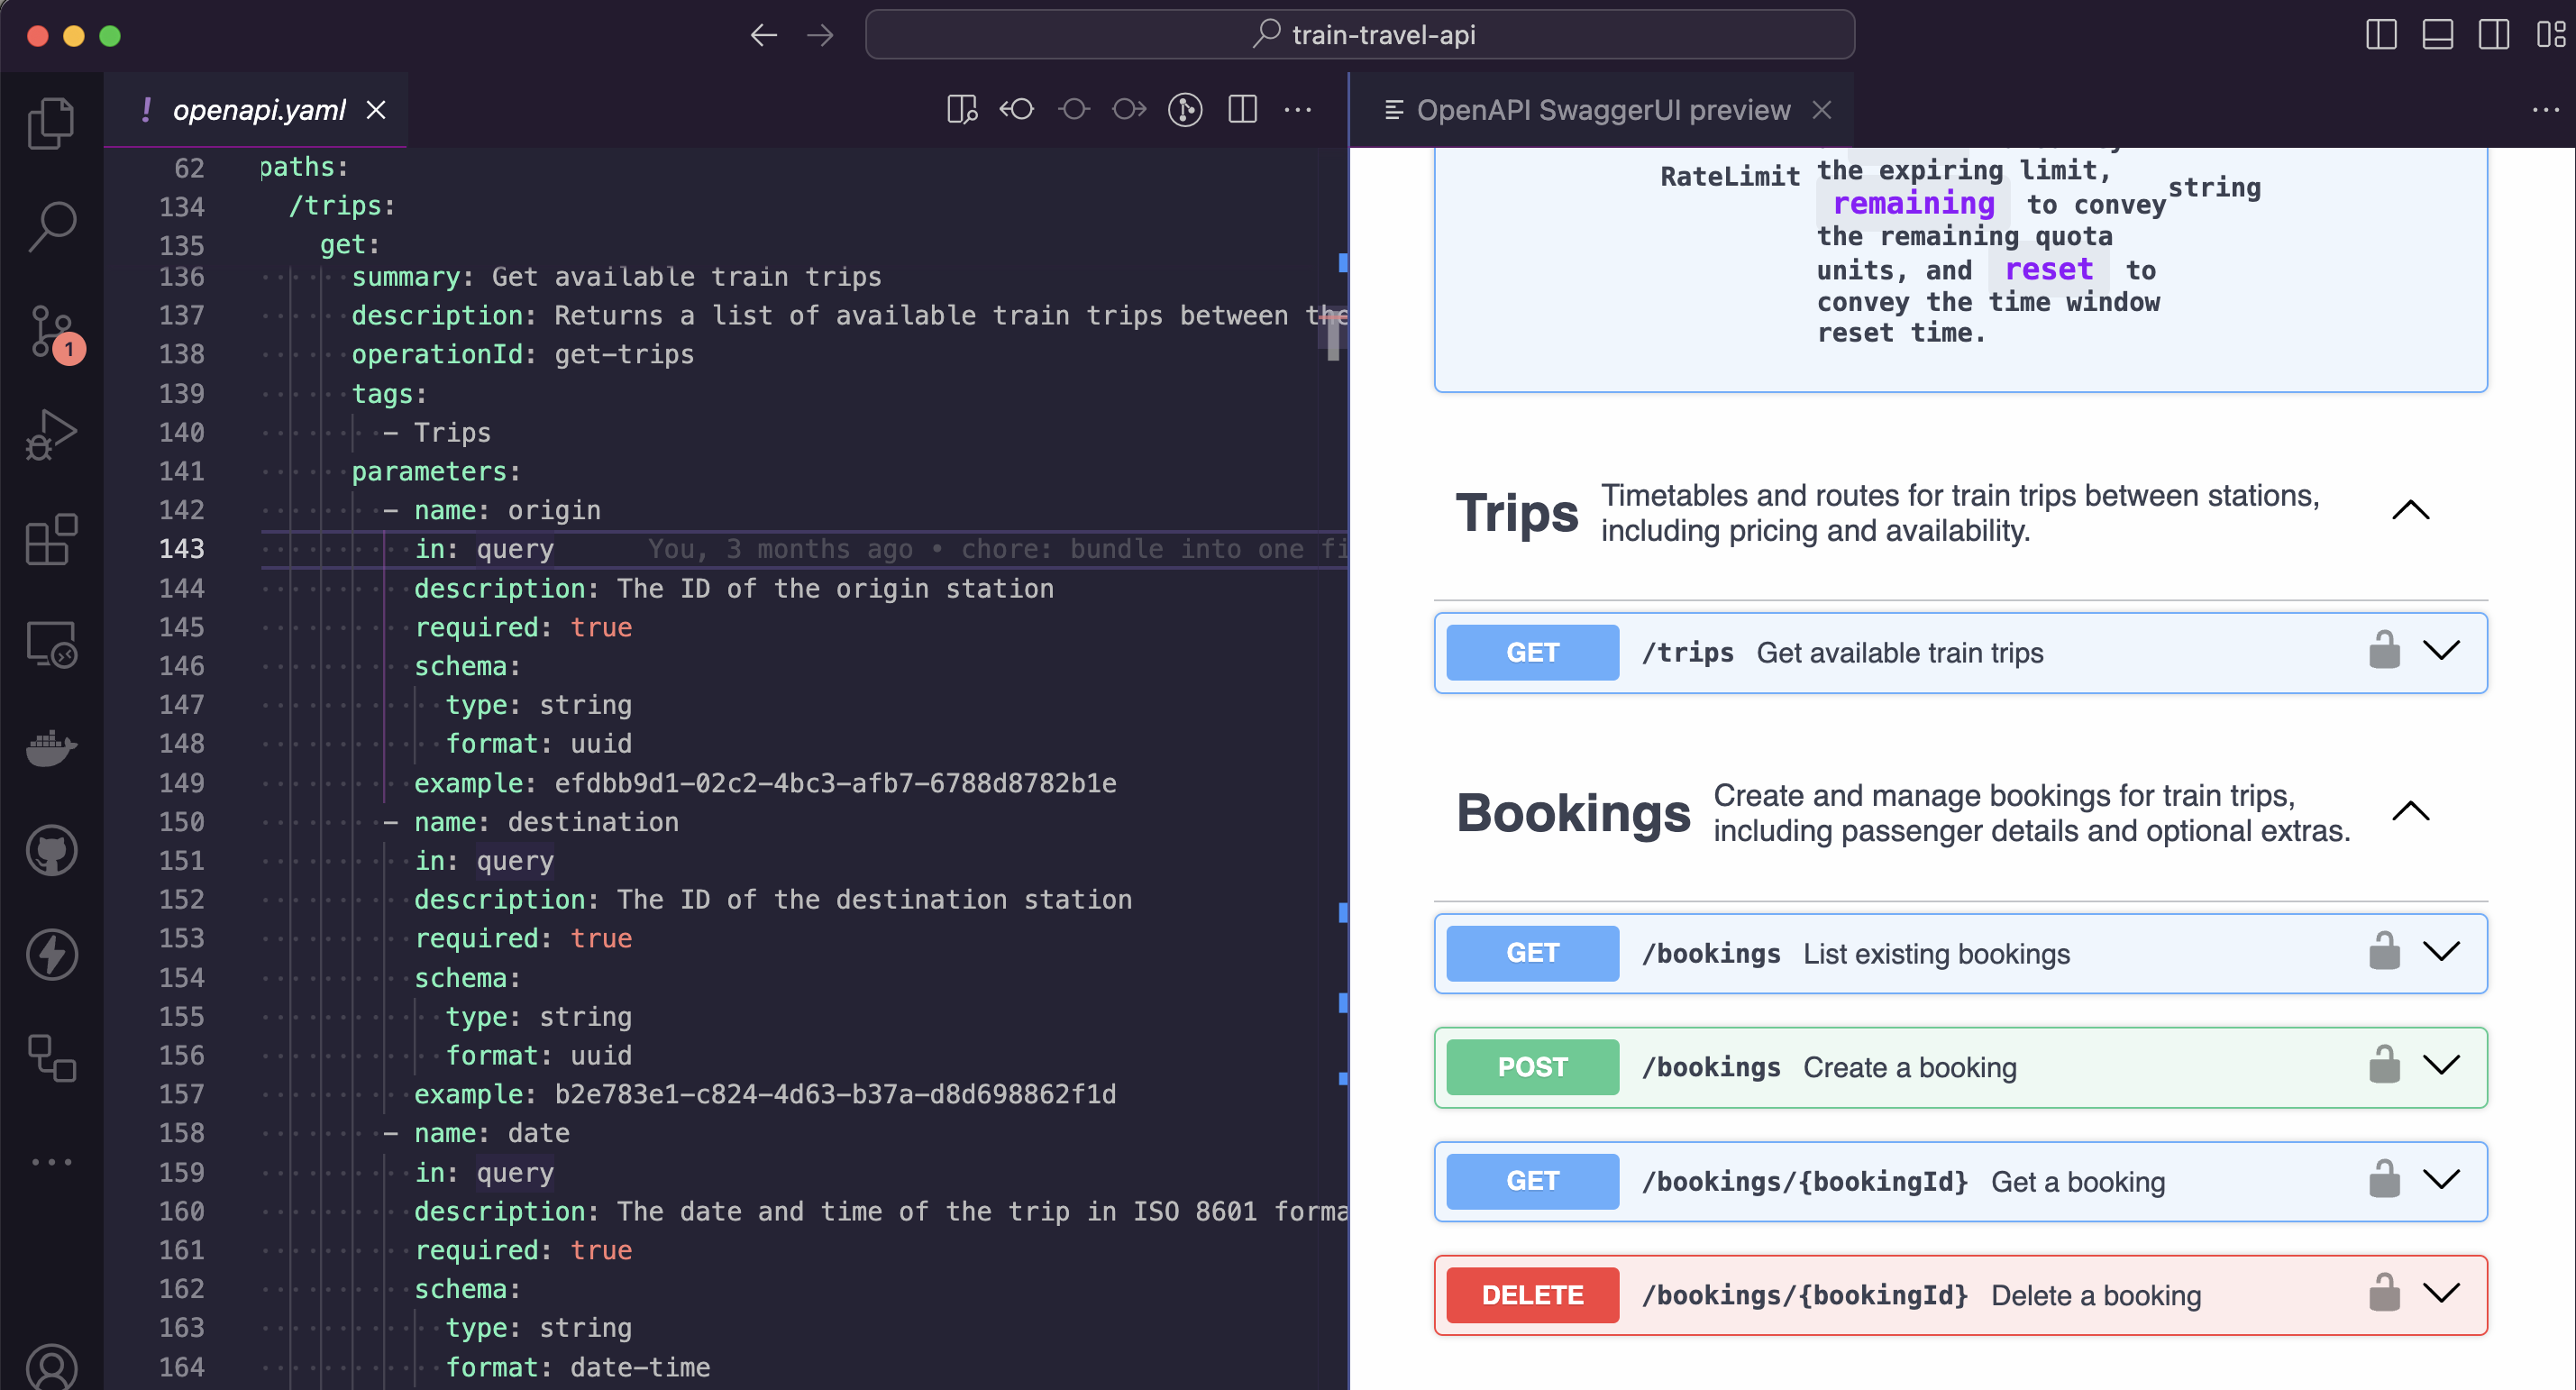
- OpenAPI Editor by 42Crunch - code navigation, linting, SwaggerUI or ReDoc preview, IntelliSense, schema enforcement and generation, schema definition links, snippets as well as static and dynamic security analysis.
- OpenAPI Preview by Andreas Zoellner - Preview panel using Stoplight Elements.
- OpenAPI Viewer by Andrew Butson - Preview panel using RapiDoc.
The OpenAPI Editor from 42 Crunch is a powerful choice, offering not just a preview panel but auto-complete and a “explorer” view to help you move around the OpenAPI document. It also has a choice of preview tools, with Swagger UI being the exact same tool used on SwaggerHub.
The other tools offer just a preview experience, but offer two alternative open-source OpenAPI rendering tools to give you a few options in how you look at the OpenAPI as you go.
JetBrains IntelliJ #
The JetBrains team clearly recognize the importance of OpenAPI to their IntelliJ, PhpStorm, RubyMine, etc. community because they’ve created an official extension: Jetbrains OpenAPI Specifications.
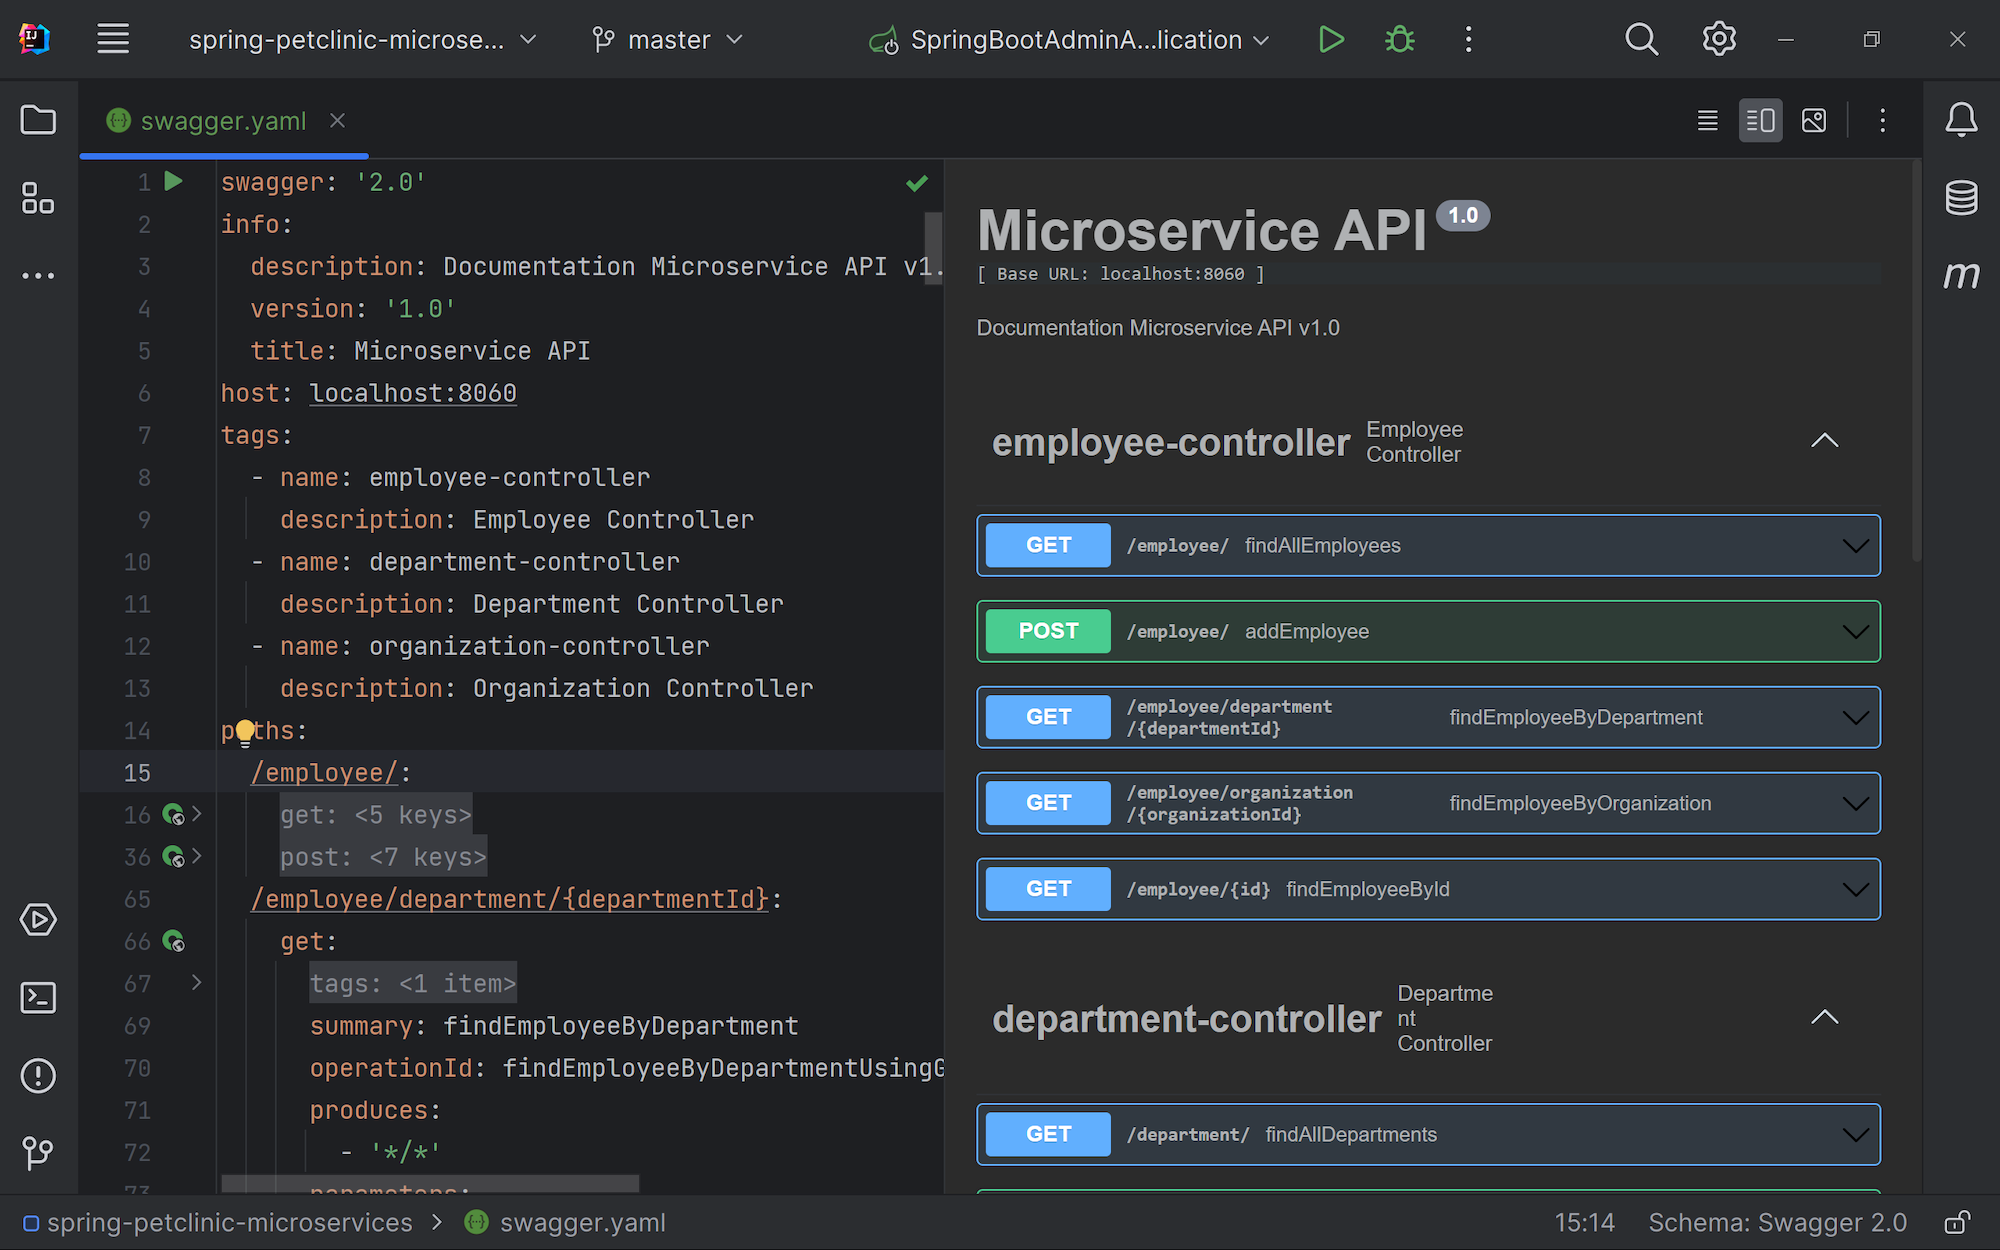
The 42Crunch team have also built an extension: OpenAPI Editor will provide IntelliSense, “Go to Definition” for $ref, and the usual preview showing SwaggerUI or ReDoc.
Other Editors #
Check on OpenAPI.Tools to find more editors with OpenAPI preview functionality like Eclipse and Vim.
If there are no OpenAPI preview tools for your editor of choice, you can open up a browser window and use the Bump.sh CLI’s preview --live command to see how changes look as you work on your document.
$ bump preview openapi.yaml --live

* Let's render a preview on Bump... done
* Your preview is visible at: https://bump.sh/preview/4a478f7d-8776-4c43-bc01-cf58dd7dd5f5 (Expires at 2024-05-29T16:17:06+02:00)
Waiting for changes on file openapi.yaml......
Step 3: Publish OpenAPI as Documentation #
Instead of having to click around a web interface to fork versions, “commit” changes in a web interface, make sure the changes are published, etc. Bump.sh allows you to automate the changes.
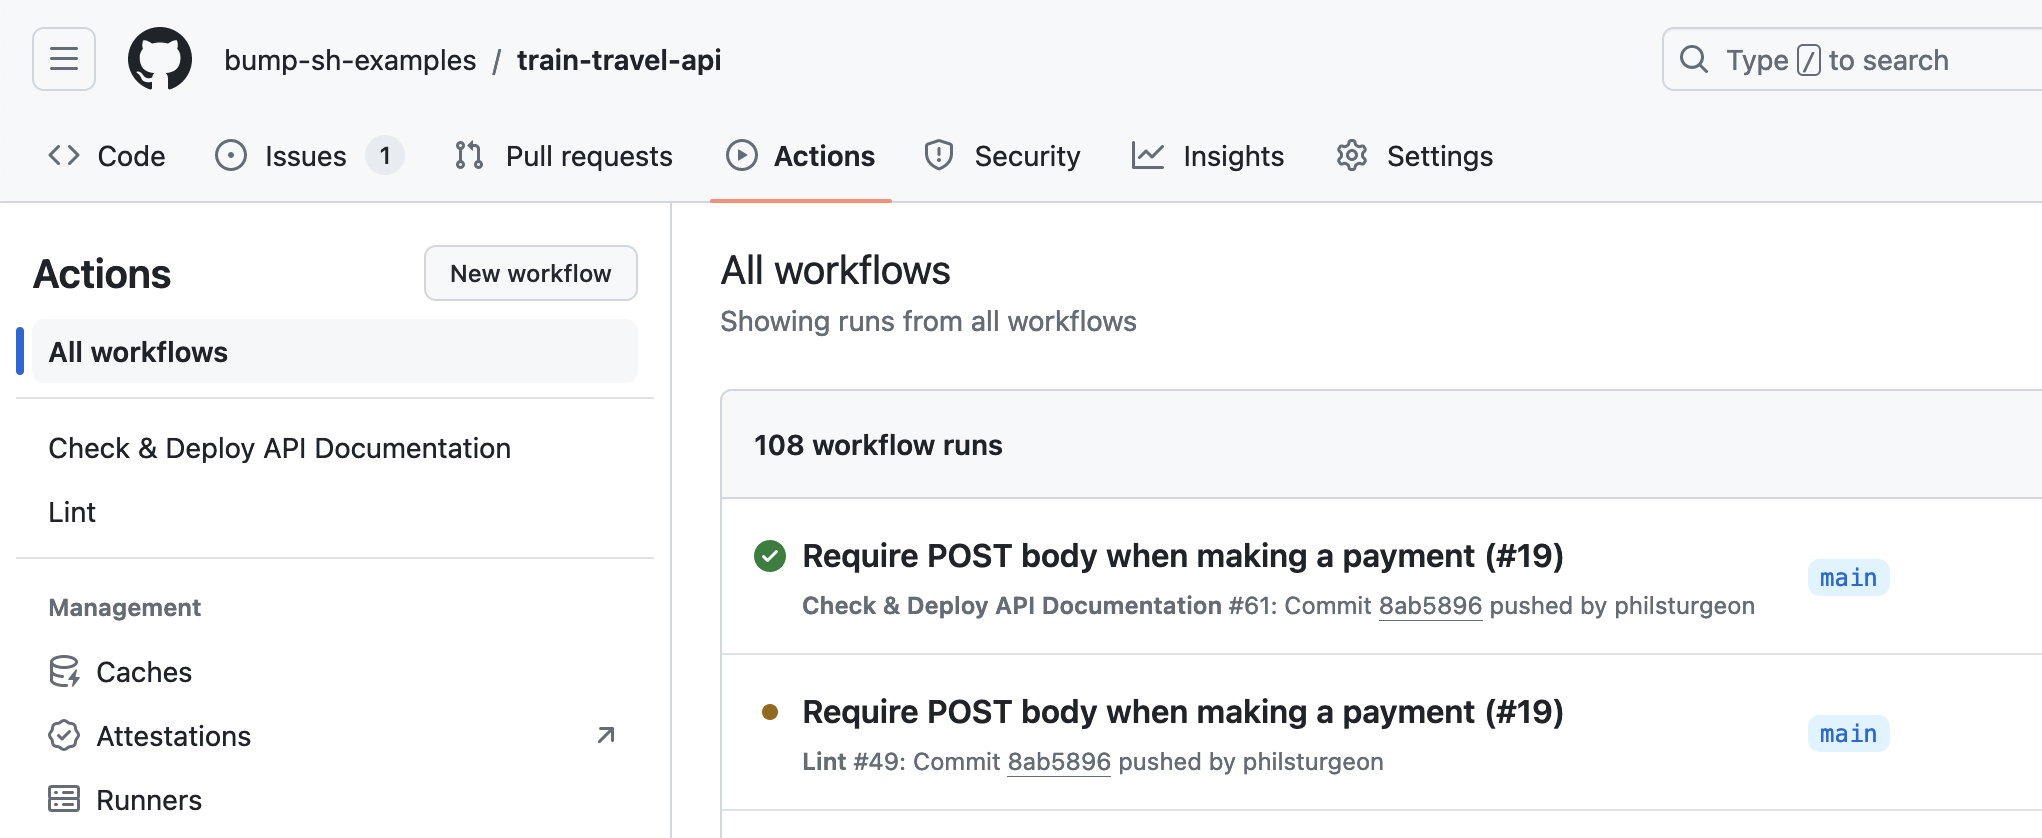
You can set up your documentation to deploy using the command-line, with the Bump.sh GitHub Action, or using any other Continuous Integration setup you like. There’s even an API for more exciting deployment integration opportunities.
A common workflow is to have Bump.sh make previews on Git branches, then deploy the main version of the documentation when a branch is merged. This allows you to defer all configuration about how reviews work, what checks should be involved, who is in charge of approving changes, etc to the pull request settings of your source control.
Once a guide is published you can view the hosted documentation on Bump.sh, and it will look a little something like this: Train Travel API Documentation.
Once you’ve done this for all of your APIs and got them publishing on commit, you can close down your SwaggerHub account and update links to your API documentation.
Step 4: Use Hubs to Group Your APIs (Optional) #
If you had your APIs grouped into different organizations you can either make multiple Bump.sh organizations, or you can use Hubs to group APIs together.